
← Back to How do I start my first plan?
How do I add a person as a stakeholder?
Short answer
Press Main menu, choose Stakeholders, press + New, choose Create a new Stakeholder on its own, choose Person, type a name, and press Create.
Before you start
You need to be signed in to GilbApp on a computer, with a vault you can write to, such as your own vault. The pictures show a made-up person on a test site; your screen shows your own name and address.
Words used here (3)
- GilbApp
- GilbApp is the app, opened in a web browser at https://gilb.com/app, where you open, fill and share your vaults.
- record
- A record is one piece of data with its own address, such as a person, a place, a thing or a note.
- virtual folder
- A virtual folder is a view that groups records and files without moving them; each may sit in several folders.
Steps
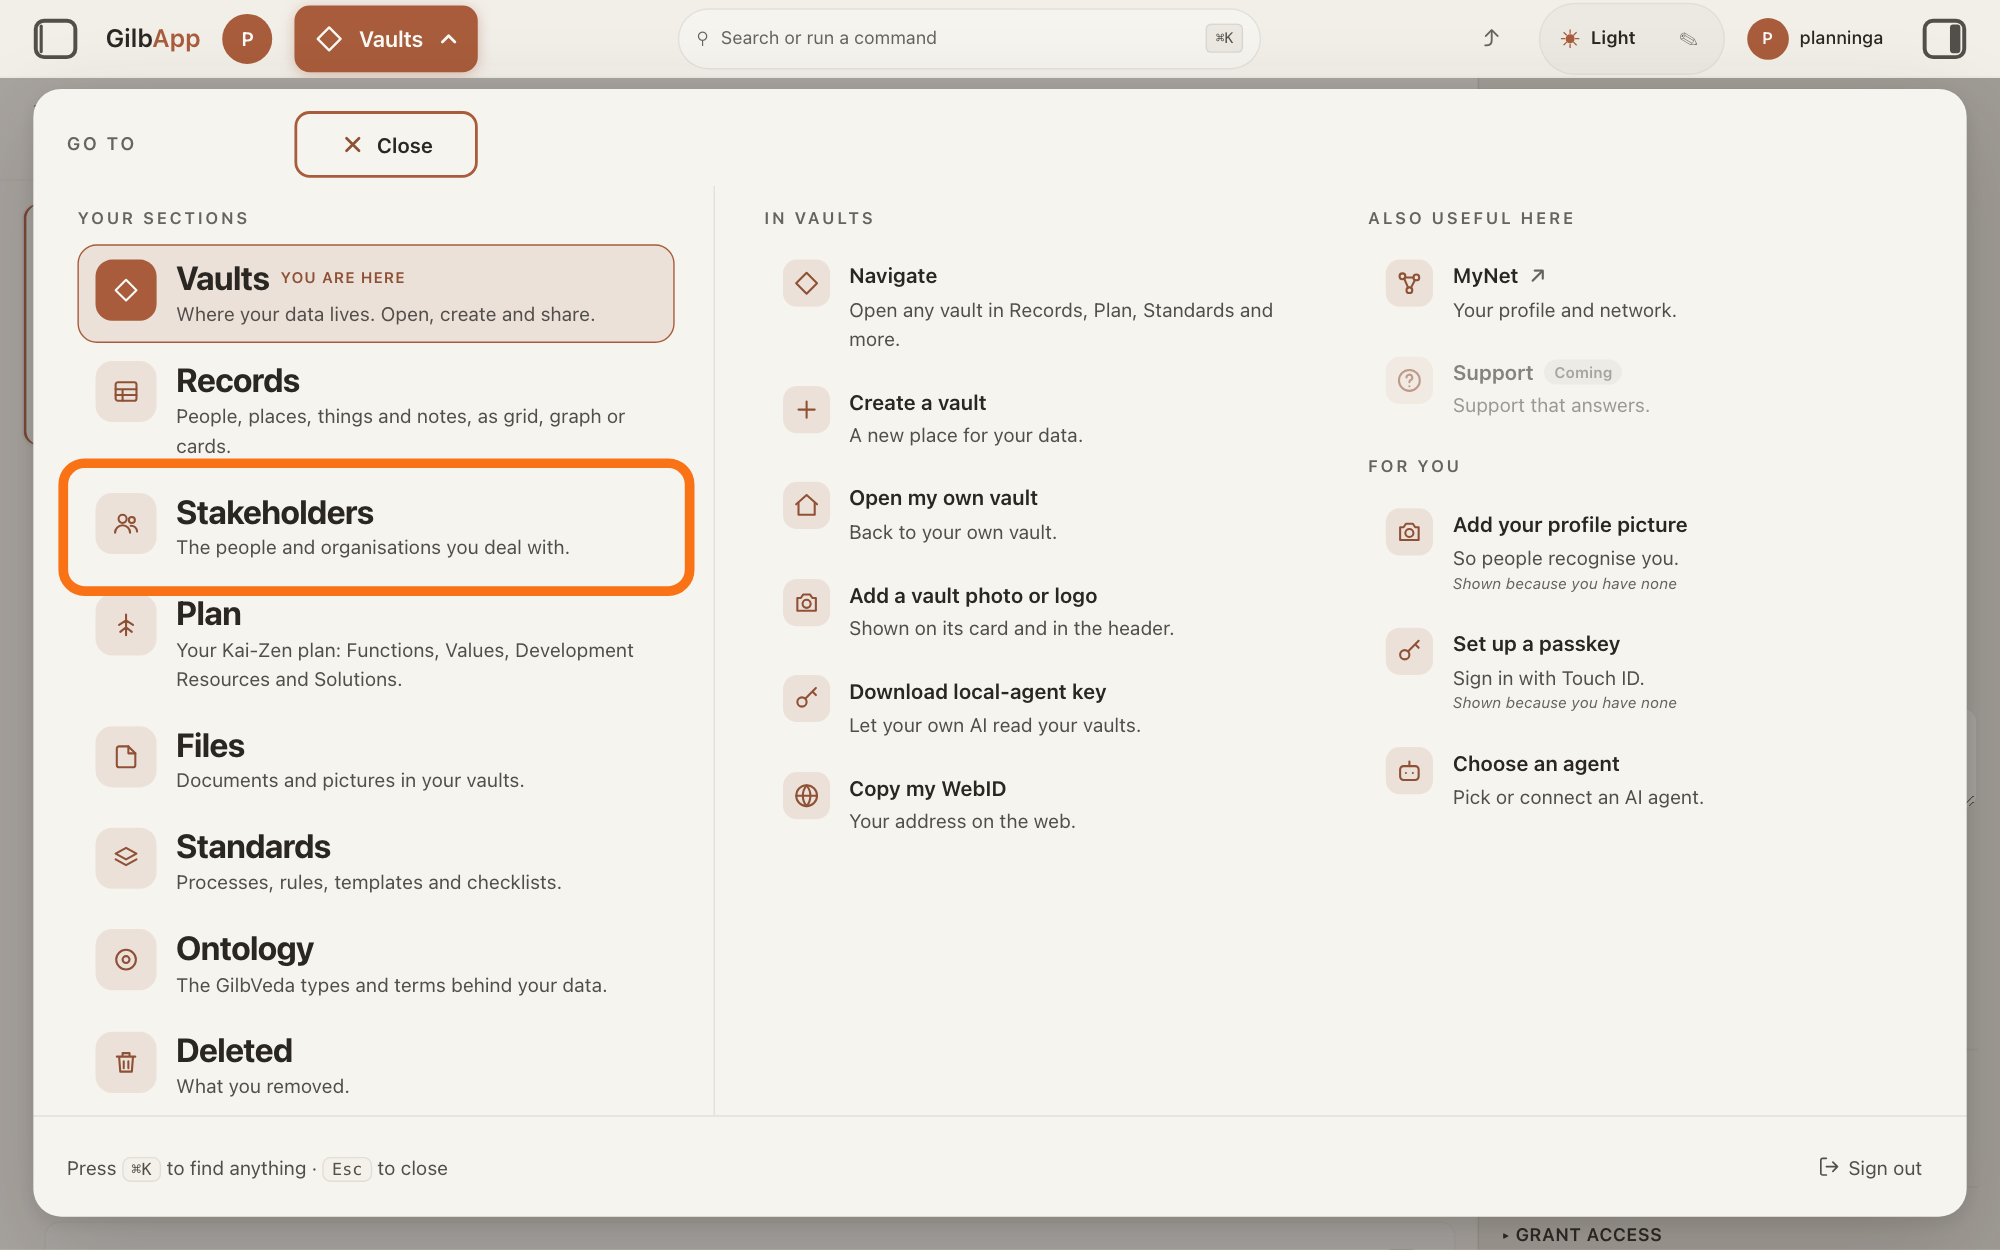
Press Main menu at the top left and choose Stakeholders.
Press Main menu, next to your profile picture at the top left, and under YOUR SECTIONS choose Stakeholders. The button shows the name of the section you are in, such as Vaults. A stakeholder is a person, group or system that cares whether a Value goes up or down.
Show as text
The "GO TO" panel is open. In the left column under "YOUR SECTIONS", the outlined row is "Stakeholders", with the line "The people and organisations you deal with." Press it.
More about this
A panel headed GO TO opens; Stakeholders reads The people and organisations you deal with. You can also press the Stakeholders button on the card of a vault (the place where a person or a group keeps their records) in Vaults. The screen lists your stakeholders and has the views Grid, Graph, Both and Card. The list also holds organisations, systems and groups; the TYPE column says which are Person.
Press + New.
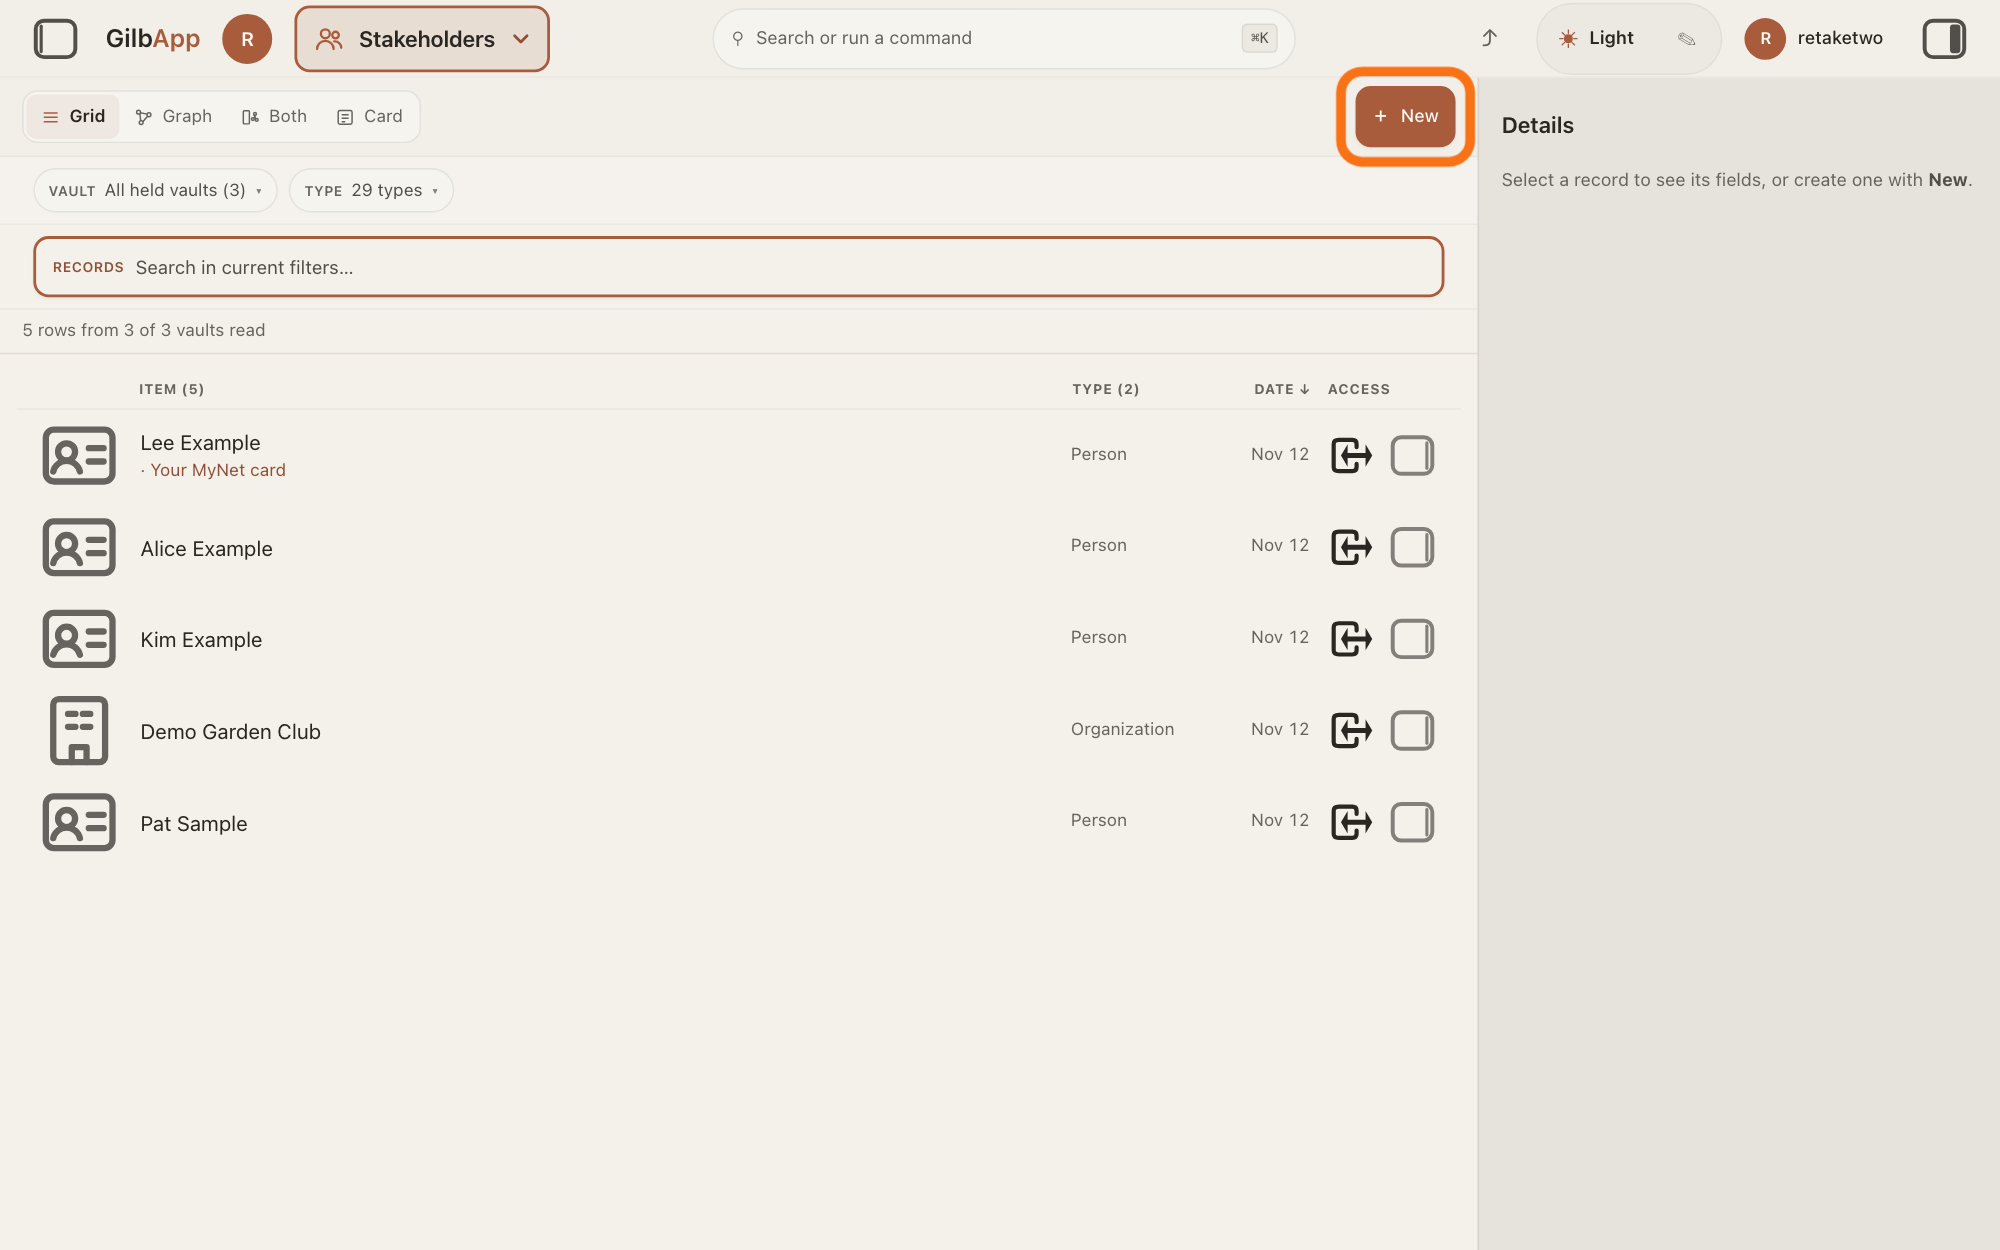
Press + New at the right end of the bar with the views Grid, Graph, Both and Card. With no record selected, New shows its choices at once.
Show as text
You are on the "Stakeholders" screen in "Grid" view, with your people and organisations listed and nothing selected. Press the outlined "+ New" button at the top right, at the end of the bar with "Grid", "Graph", "Both" and "Card".
More about this
If + New is greyed, hover on it for the reason; one reason is that the vault you are viewing is one you can only read. If a record is selected in the list, the linking choices are on: Create a new Stakeholder and link it to that record, and Link it to an existing Stakeholder. Choose the one on its own in step 3. The GO TO panel also has New stakeholder (Add a person or organisation.) under Stakeholders; it opens the same New dialog.
Choose Create a new Stakeholder on its own.
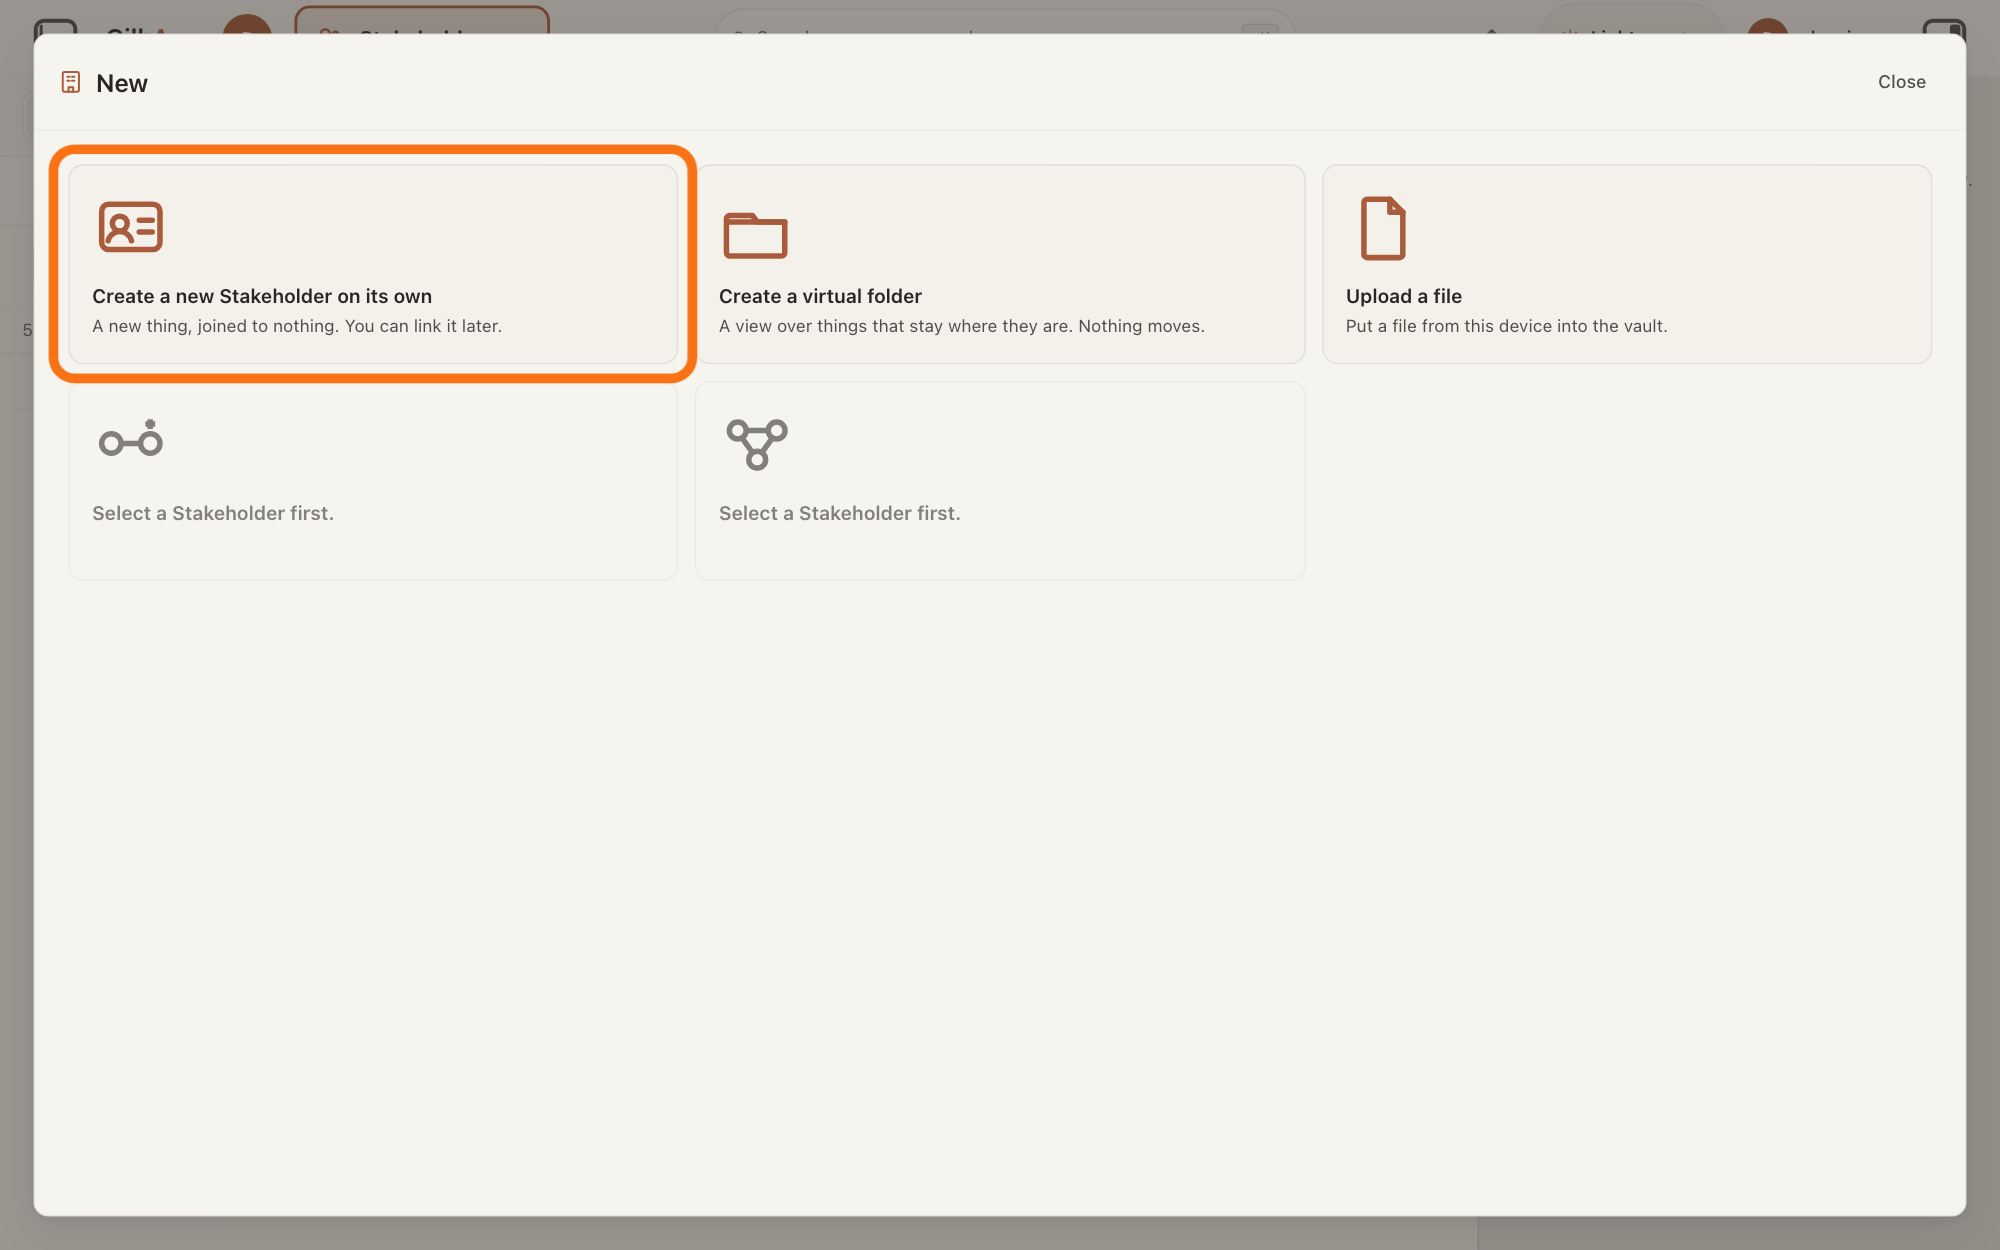
Under New, choose Create a new Stakeholder on its own. The dialog New Stakeholder opens.
Show as text
A window headed "New" shows tiles. The outlined tile at the top left is "Create a new Stakeholder on its own", with the line "A new thing, joined to nothing. You can link it later." Press it. The two greyed tiles say "Select a Stakeholder first."
More about this
The tile says A new thing, joined to nothing. You can link it later. The other choices do something else: Create a virtual folder and Upload a file. Two tiles are greyed and say Select a Stakeholder first.; they link a new record to one you have selected, and you do not need them. Close at the top of the dialog closes it and makes nothing.
Under What are you recording?, choose Person.
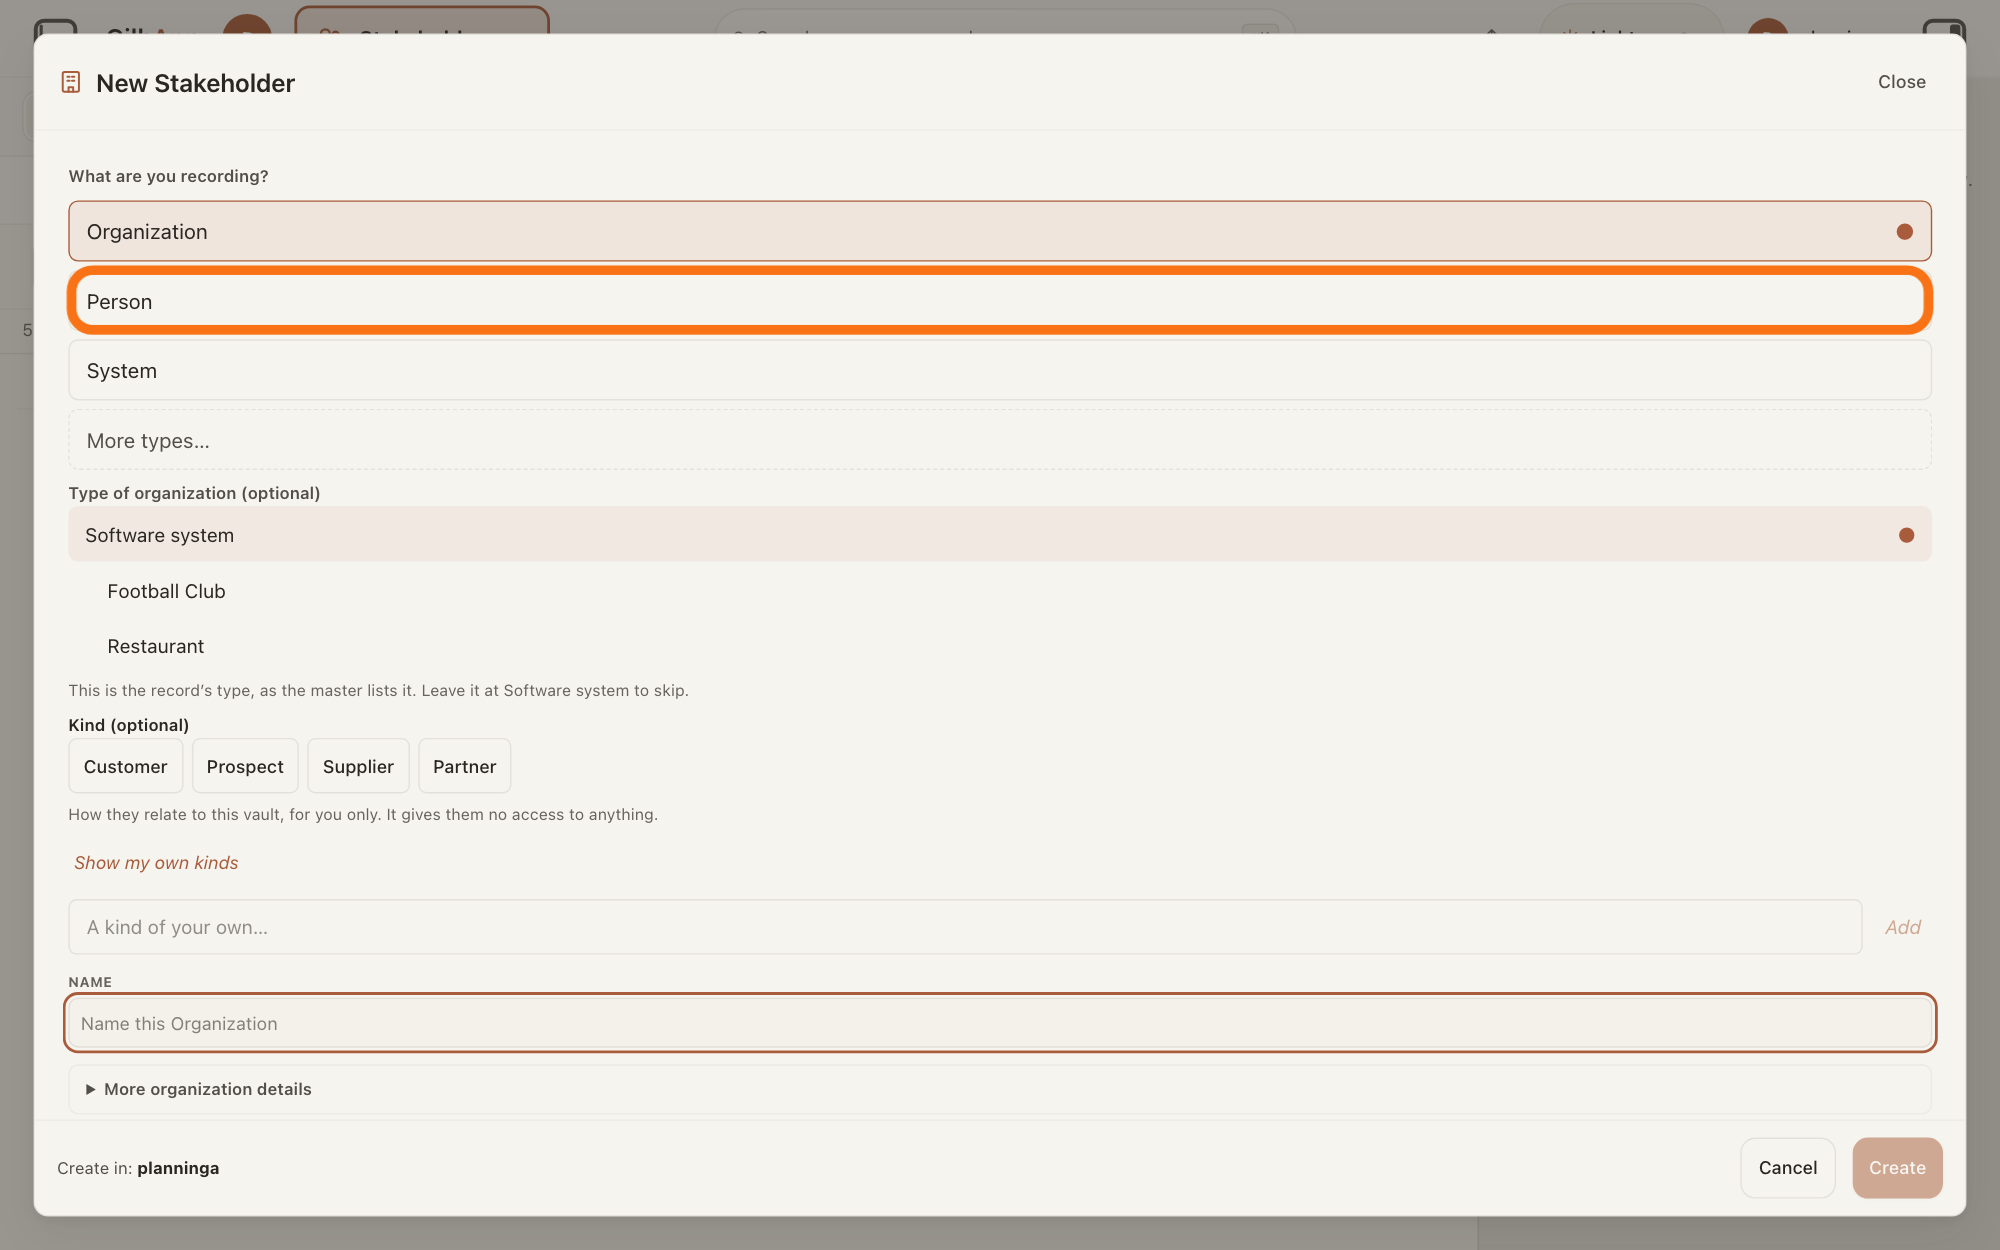
Under What are you recording?, choose Person. The list starts on Organization, so choose Person before you type.
Show as text
The window is now headed "New Stakeholder". Under "What are you recording?" the rows are "Organization", "Person", "System" and "More types…". Press the outlined row "Person".
More about this
The list shows Organization, Person and System, and More types… opens every other kind of record you can make here. Only Person makes a person. A person needs nothing but a name.
If Kind (optional) shows and you want one, choose a kind.
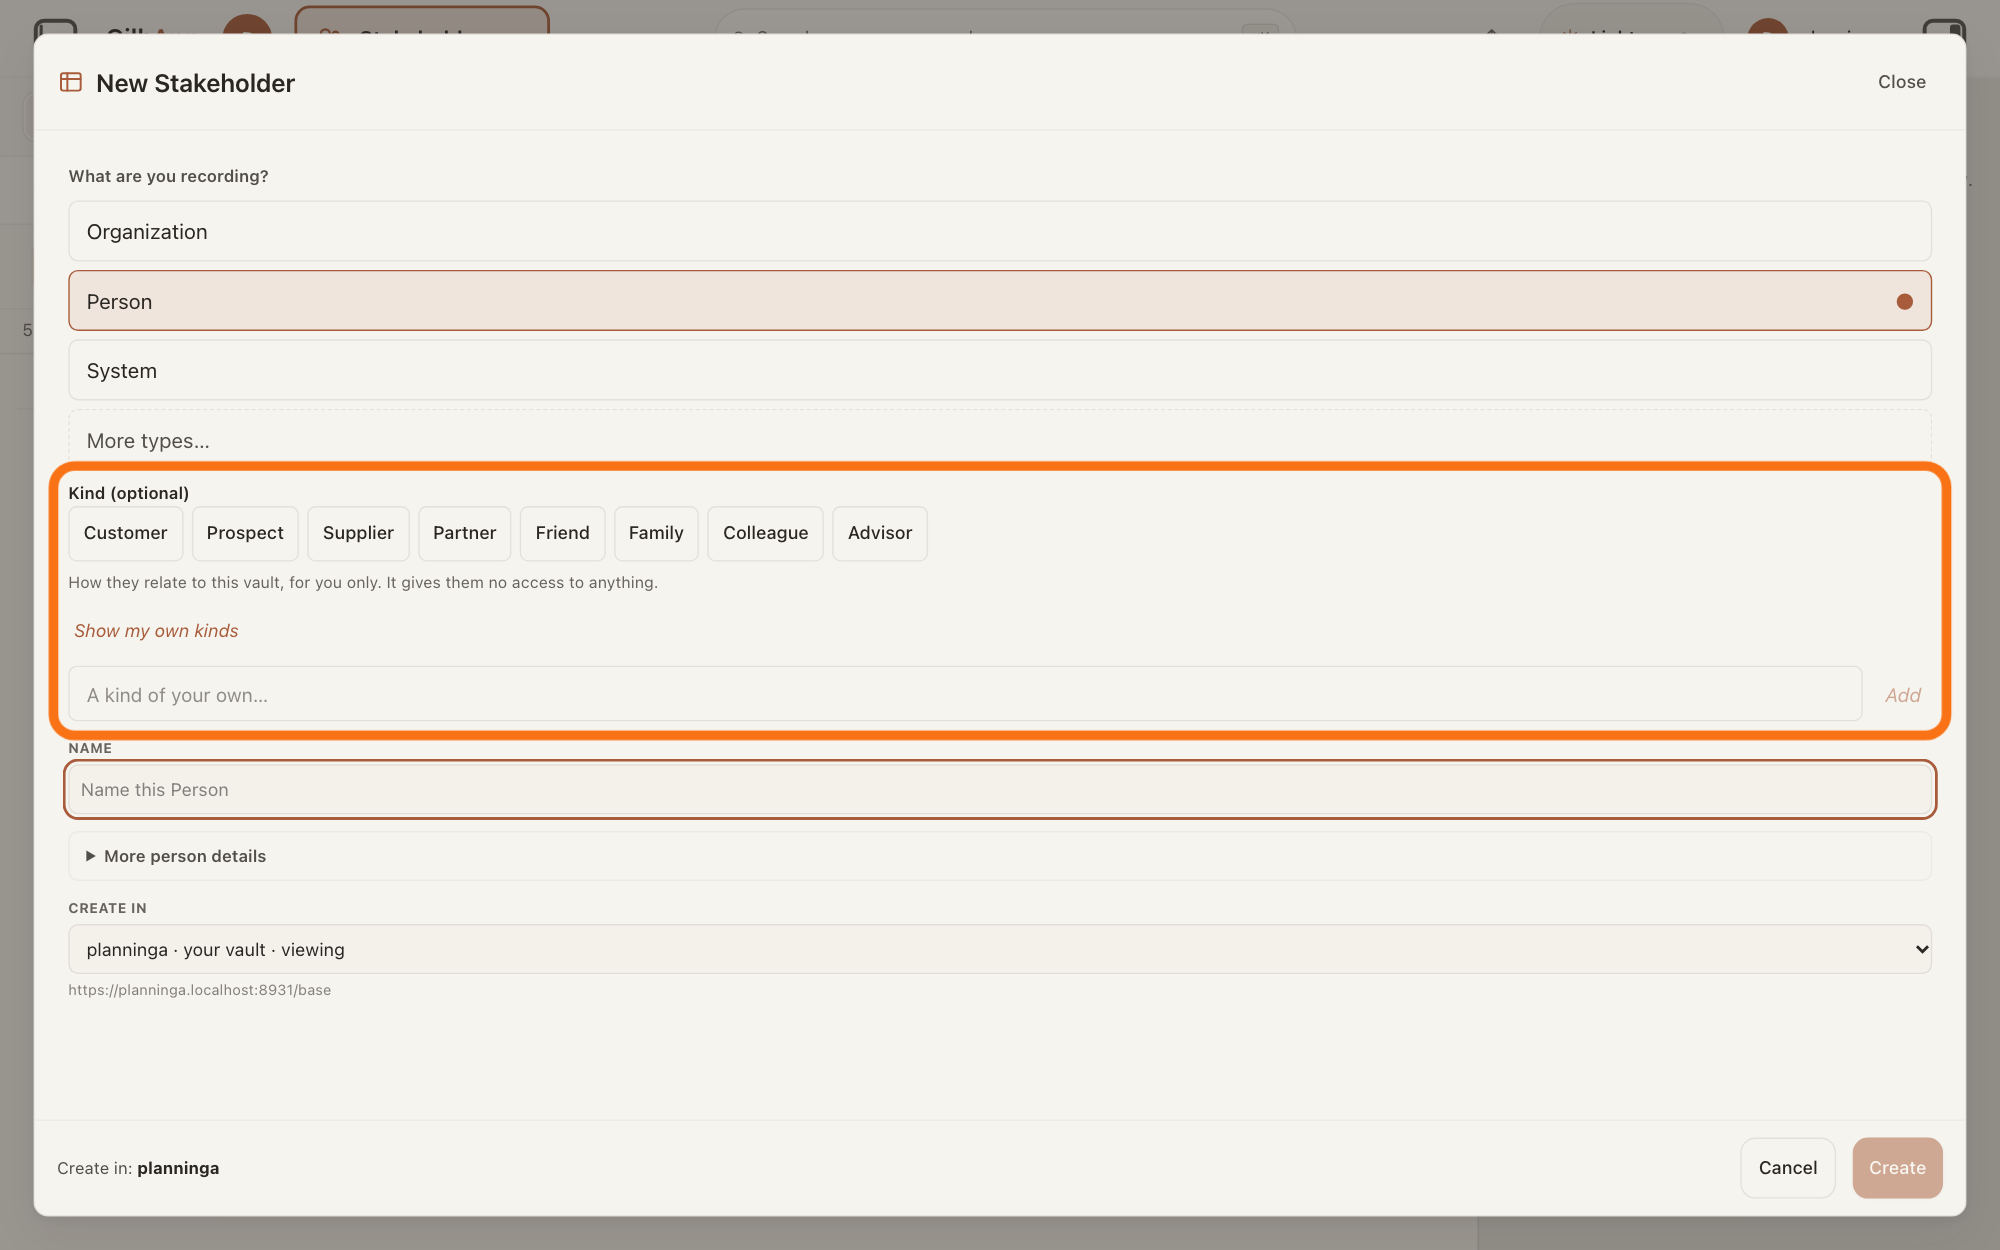
If a block headed Kind (optional) shows and you want one, choose a kind in it to say what the person is to you. Skip it if you do not want one.
Show as text
"Person" is chosen. Below it the outlined block "Kind (optional)" holds kind buttons such as "Customer", "Supplier", "Friend" and "Colleague", the line "How they relate to this vault, for you only.", "Show my own kinds" and the box "A kind of your own…". Press a kind if you want one, or leave it.
More about this
The block shows only when CREATE IN is your own vault. Its ready kinds come from GilbVeda, the shared list of terms. A chosen kind is marked ✓; press it again to unchoose it. Where the general tie, associated-with, is offered, it starts ticked, and choosing a more exact kind replaces it. The line under the buttons says "How they relate to this vault, for you only. It gives them no access to anything." Show my own kinds lists kinds you made before. The box A kind of your own… with Add saves a new kind in your vault at once, even if you then close the dialog. None of this is needed.
Type the name in NAME.
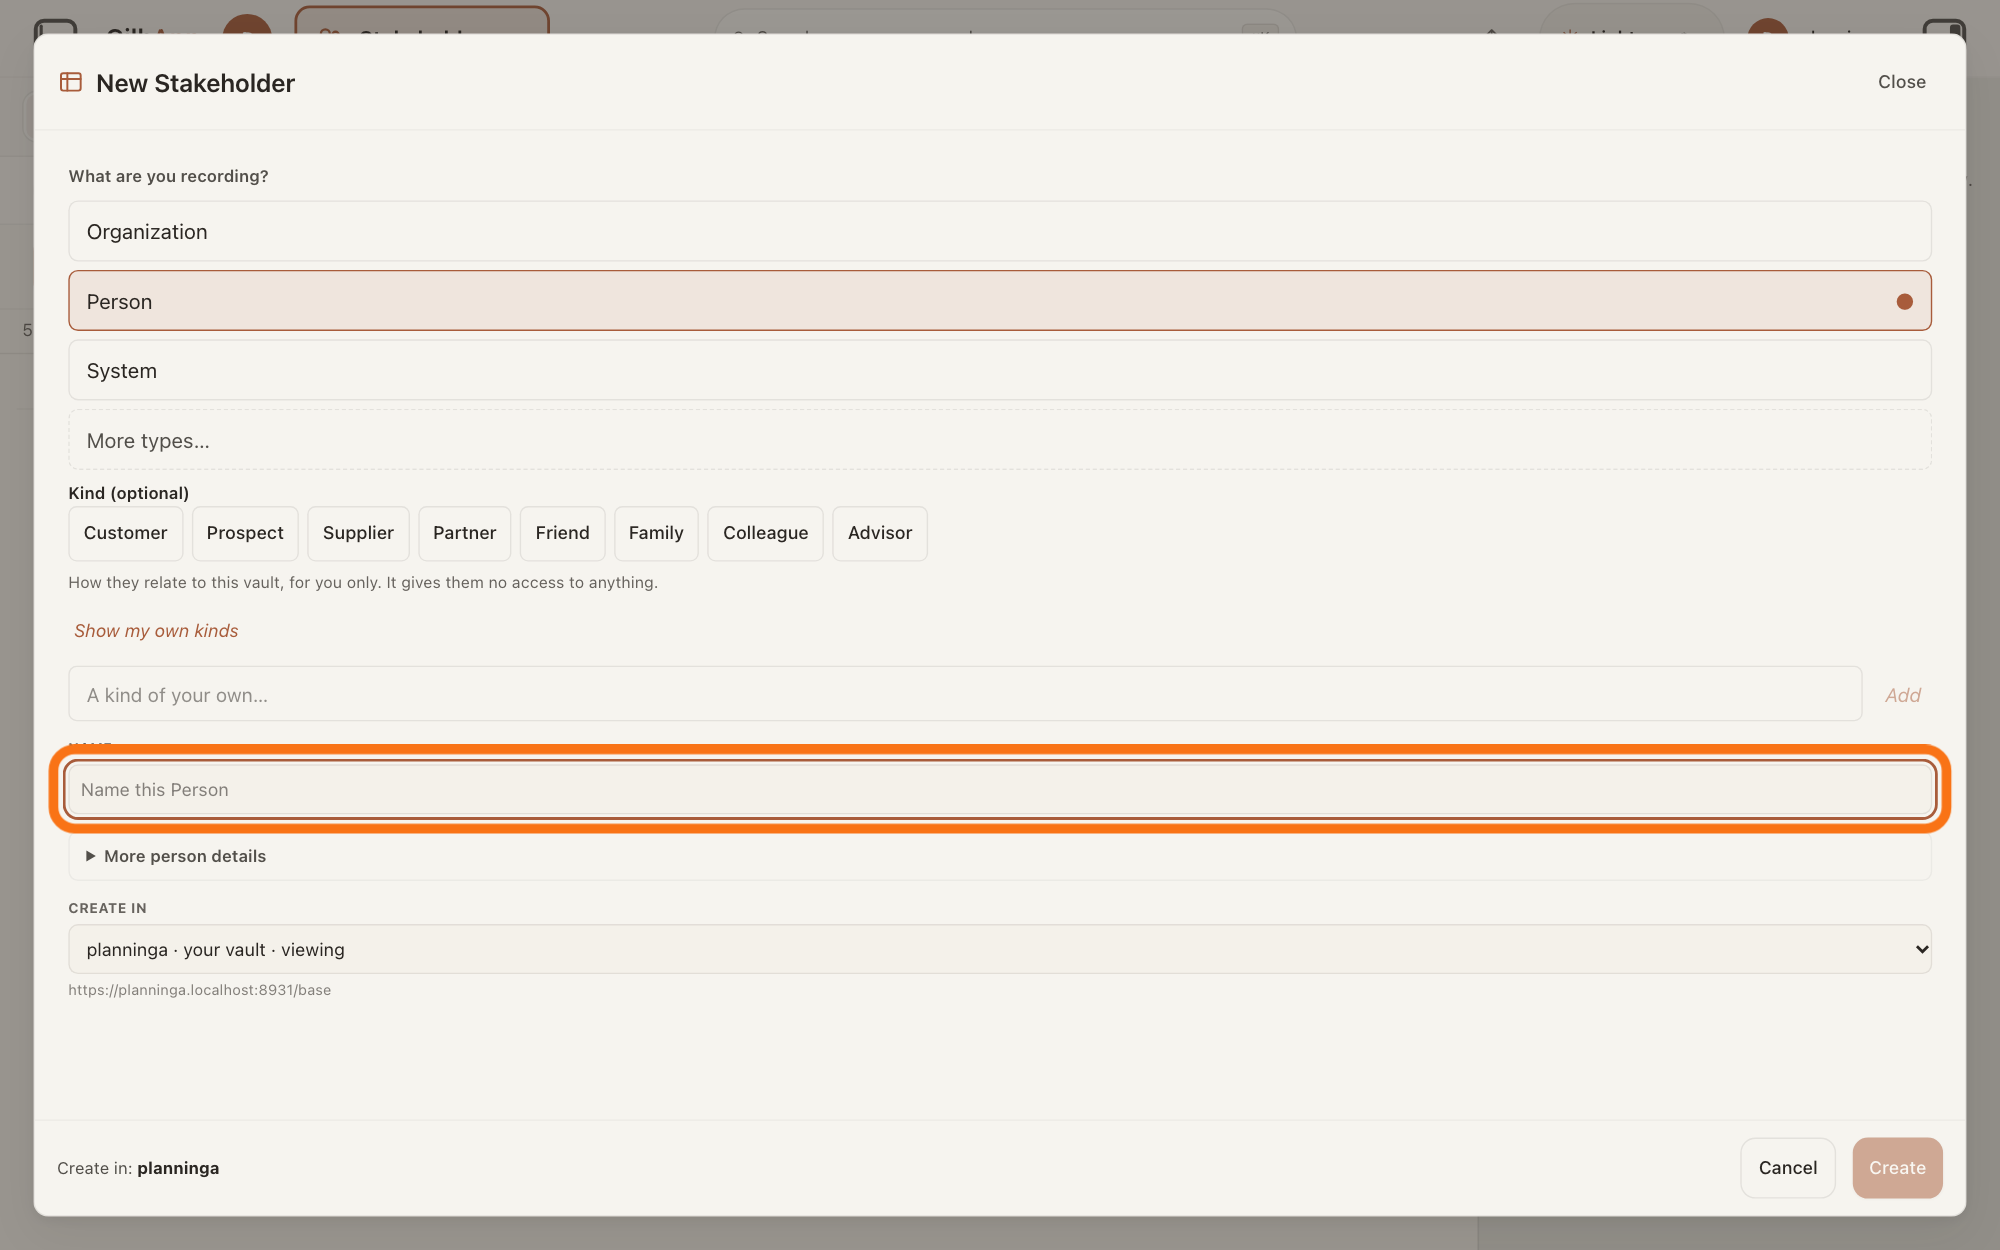
Type the person's name in NAME. Use the name you would look for in the list later.
Show as text
In the "New Stakeholder" window, "Person" is chosen. The outlined box is the one under "NAME", reading "Name this Person". Click it and type the person's name.
More about this
Create stays greyed until the box holds a name. Pressing Enter in NAME does not create the person: it opens More person details and moves you to its first line. After two letters the dialog may list people already in the vault (Already in this vault — open this one instead of making a new one:); pick one to open that card instead of making a second.
If you want, open More person details and type what you know.
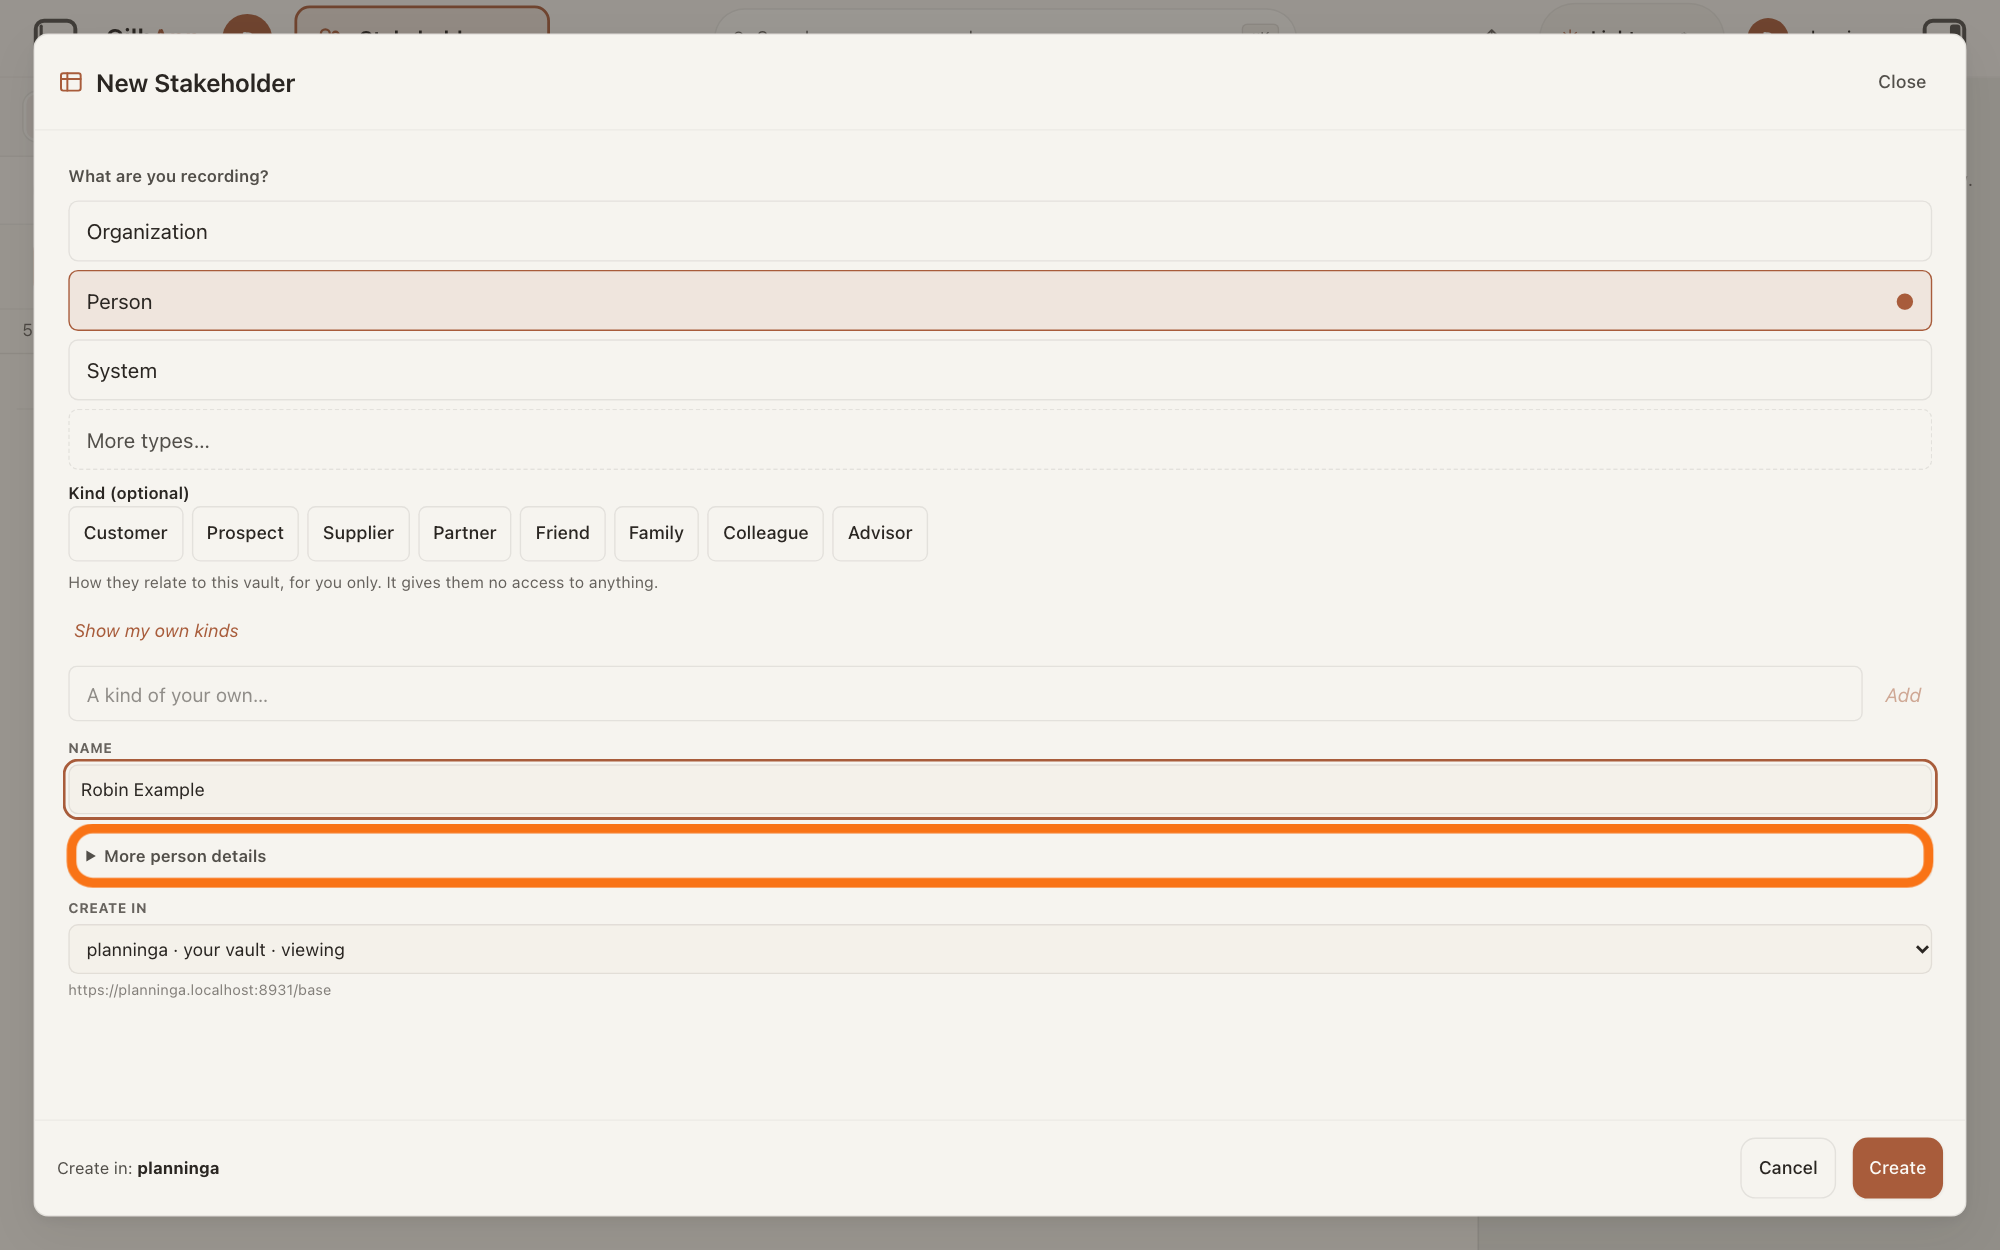
Open More person details, then type in any line you know. All lines are optional.
Show as text
A name is typed under "NAME". Just below it, the outlined fold line is "More person details". Press it if you want to add more, such as an e-mail address or a phone number.
More about this
The lines come from GilbVeda, the shared list of terms, so they can change. They are EMAIL, FAMILY NAME, GIVEN NAME, ONLINE ACCOUNT, PHONE, POSTAL ADDRESS, PROFILE PHOTO and WEB ADDRESS; each is a box you type in. An ONLINE ACCOUNT is a name you use on another website or app, and a WEB ADDRESS is the address of a web page. You do not need PENDING EMPLOYMENT ORGANISATION or PENDING EMPLOYMENT TITLE; the screen does not say what they are for, so leave them empty.
Under CREATE IN, choose the vault if the one shown is not right.
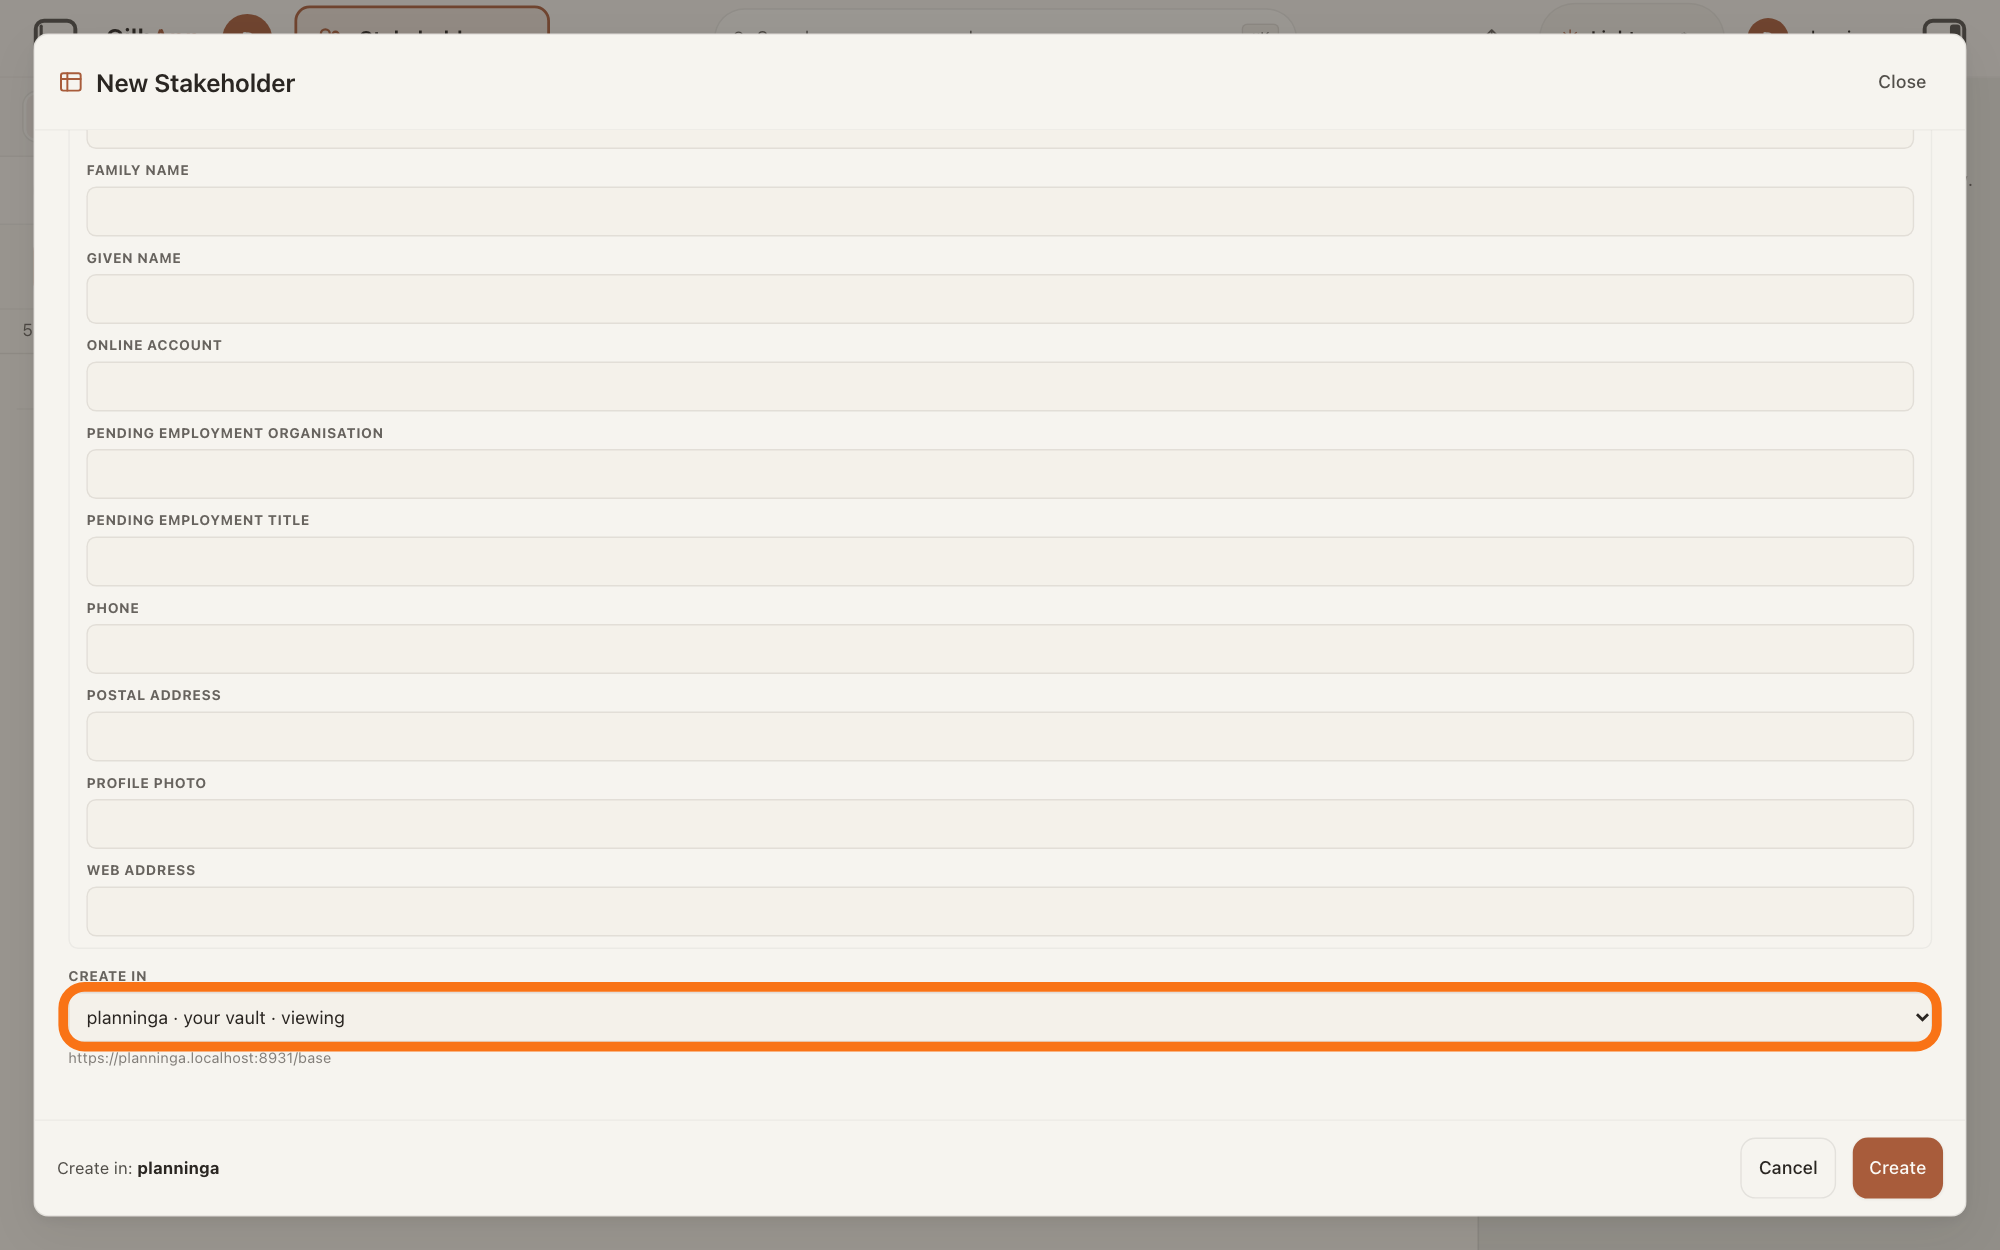
Look at CREATE IN and, if it shows the wrong vault, choose the right one in the list. The list holds the vaults you can write to.
Show as text
The window is scrolled down past the open "More person details" boxes, such as "FAMILY NAME", "GIVEN NAME" and "PHONE". The outlined list is under "CREATE IN" and names your vault. Open it and choose another vault only if this one is not right.
More about this
With one vault you can write to and none you can only read, CREATE IN is a plain line, not a list. Vaults you can only read say read only, you cannot create there and cannot be chosen. A line by Create says Create in: and the vault's name, and adds not the vault you are viewing when it is another one. Changing the vault can show or hide Kind (optional).
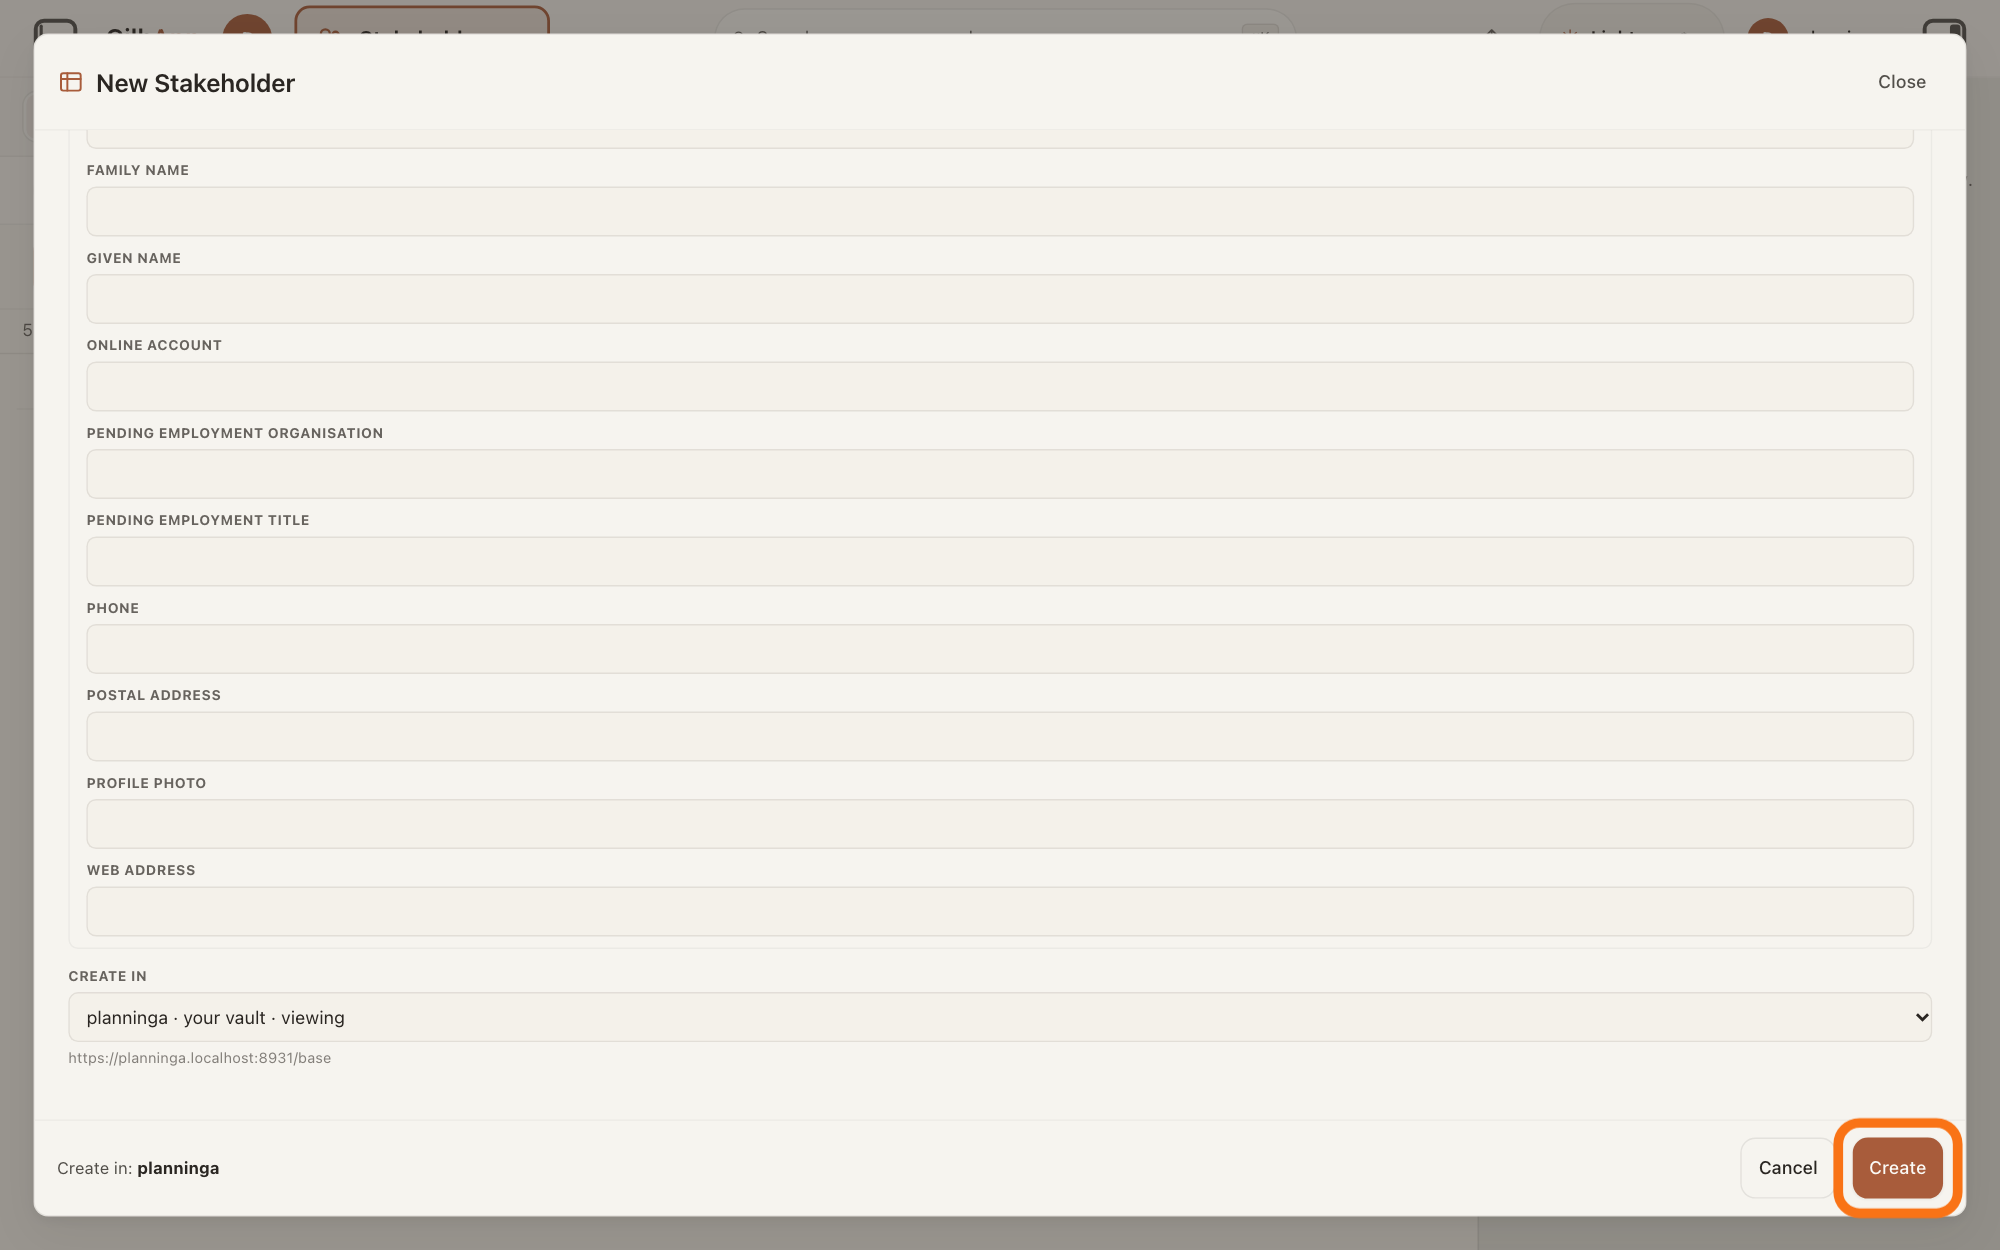
Press Create.
Press Create at the foot of the dialog. The dialog closes and the new person is opened.
Show as text
At the bottom right of the "New Stakeholder" window are "Cancel" and the outlined "Create" button; at the bottom left, "Create in:" names the vault. Press "Create" to save the person.
More about this
Cancel closes the dialog and makes nothing. If you chose a vault other than the one you are viewing, the dialog stays open and says the person was made there, not in the vault you are viewing. It is not drawn here., with an Open it button that opens the person. If a kind could not be kept, the dialog says the person was made and that you can add the kind on the card.
Deeper
Only a name is needed to add a person. Create stays greyed until you type one, and a vault you can write to must be chosen.
This makes a card for the person in the vault you choose, with the name and any details you type. The dialog has no line for what the person wants or what part they play. To say a person has a stake in a record of your plan, search and select them under Stakeholder on that record's card.
When you type a name, the dialog may list people already in the vault. Do not rely on it: look in the Stakeholders list first (its search box shows Search in current filters…), so you do not make a second card for the same person.
This answer is written for a computer screen.
Source: GilbApp af0f04ee838a4d55887d2ff1f72edd49a4ff7ca0 (https://gilb.com/app/version.json, built 2026-11-09, read 2026-11-09); files this answer rests on unchanged since aa86eba6 (StakeholderStart.tsx, stakeholderStart.ts, startKinds.ts, ConnectedCreateDialog.tsx, useStakeholderCreate.ts, StakeholderMatches.tsx, VaultTargetSelect.tsx, NewRecordButton.tsx, CreateModeChooser.tsx, gilbAppMenuRows.ts; section-menu 0.2.4 and gilb-stakeholders pins unchanged; kindRelation.ts changed only in how ties are matched unchanged). gilbAppMenuRows.ts:144-151 (Stakeholders, its line, New stakeholder); NewRecordButton.tsx:50-57, :75, :85-89; CreateModeChooser.tsx:90, :105-144; ConnectedCreateDialog.tsx:1356-1364, :1425, :1562-1580, :1679, :1723-1740, :1831-1843, :1994, :2050-2091, :2476; StakeholderStart.tsx:29, :100-137, :156-249, :265-302; StakeholderMatches.tsx:34-37; useStakeholderCreate.ts:136-140, :200-211; recordPerson.ts:96-120 (personBoxes: the person lines are the text fields GilbVeda gives t:Person); VaultTargetSelect.tsx:83-127; PlanStakeholders.tsx:440, :453. steps 5, 7, 8 (aa86eba6, same code): kind buttons with no tie ticked; person lines EMAIL to WEB ADDRESS, no JOB TITLE or claim-slot lines. GilbVeda read 2026-11-09 (public): a:jobTitle, a:pendingClaimSlotKey, a:supersededClaimSlotKey are fields of t:Employment, not t:Person; a:pendingEmploymentTitle, a:email, a:phone, a:givenName, a:familyName, a:postalAddress, a:profilePhoto are fields of t:Person; t:Stakeholder, t:Person, t:RelationshipKind, t:AssociatedWith, t:OnlineAccount, t:WebAddress. Kai-Zen.StakeholderTemplate, Agent.Stakeholder.
Checked against GilbApp d529620.