
How do I set my name and picture?
Short answer
Press Main menu, choose Add your profile picture, Upload picture and your file, press Use this area; open MyNet, press your picture, type your names.
Before you start
You need to be signed in to GilbApp on a computer, with a picture file on your computer. The pictures show a made-up person on a test site; your screen shows your own name and address.
Words used here (1)
- GilbApp
- GilbApp is the app, opened in a web browser at https://gilb.com/app, where you open, fill and share your vaults.
Steps
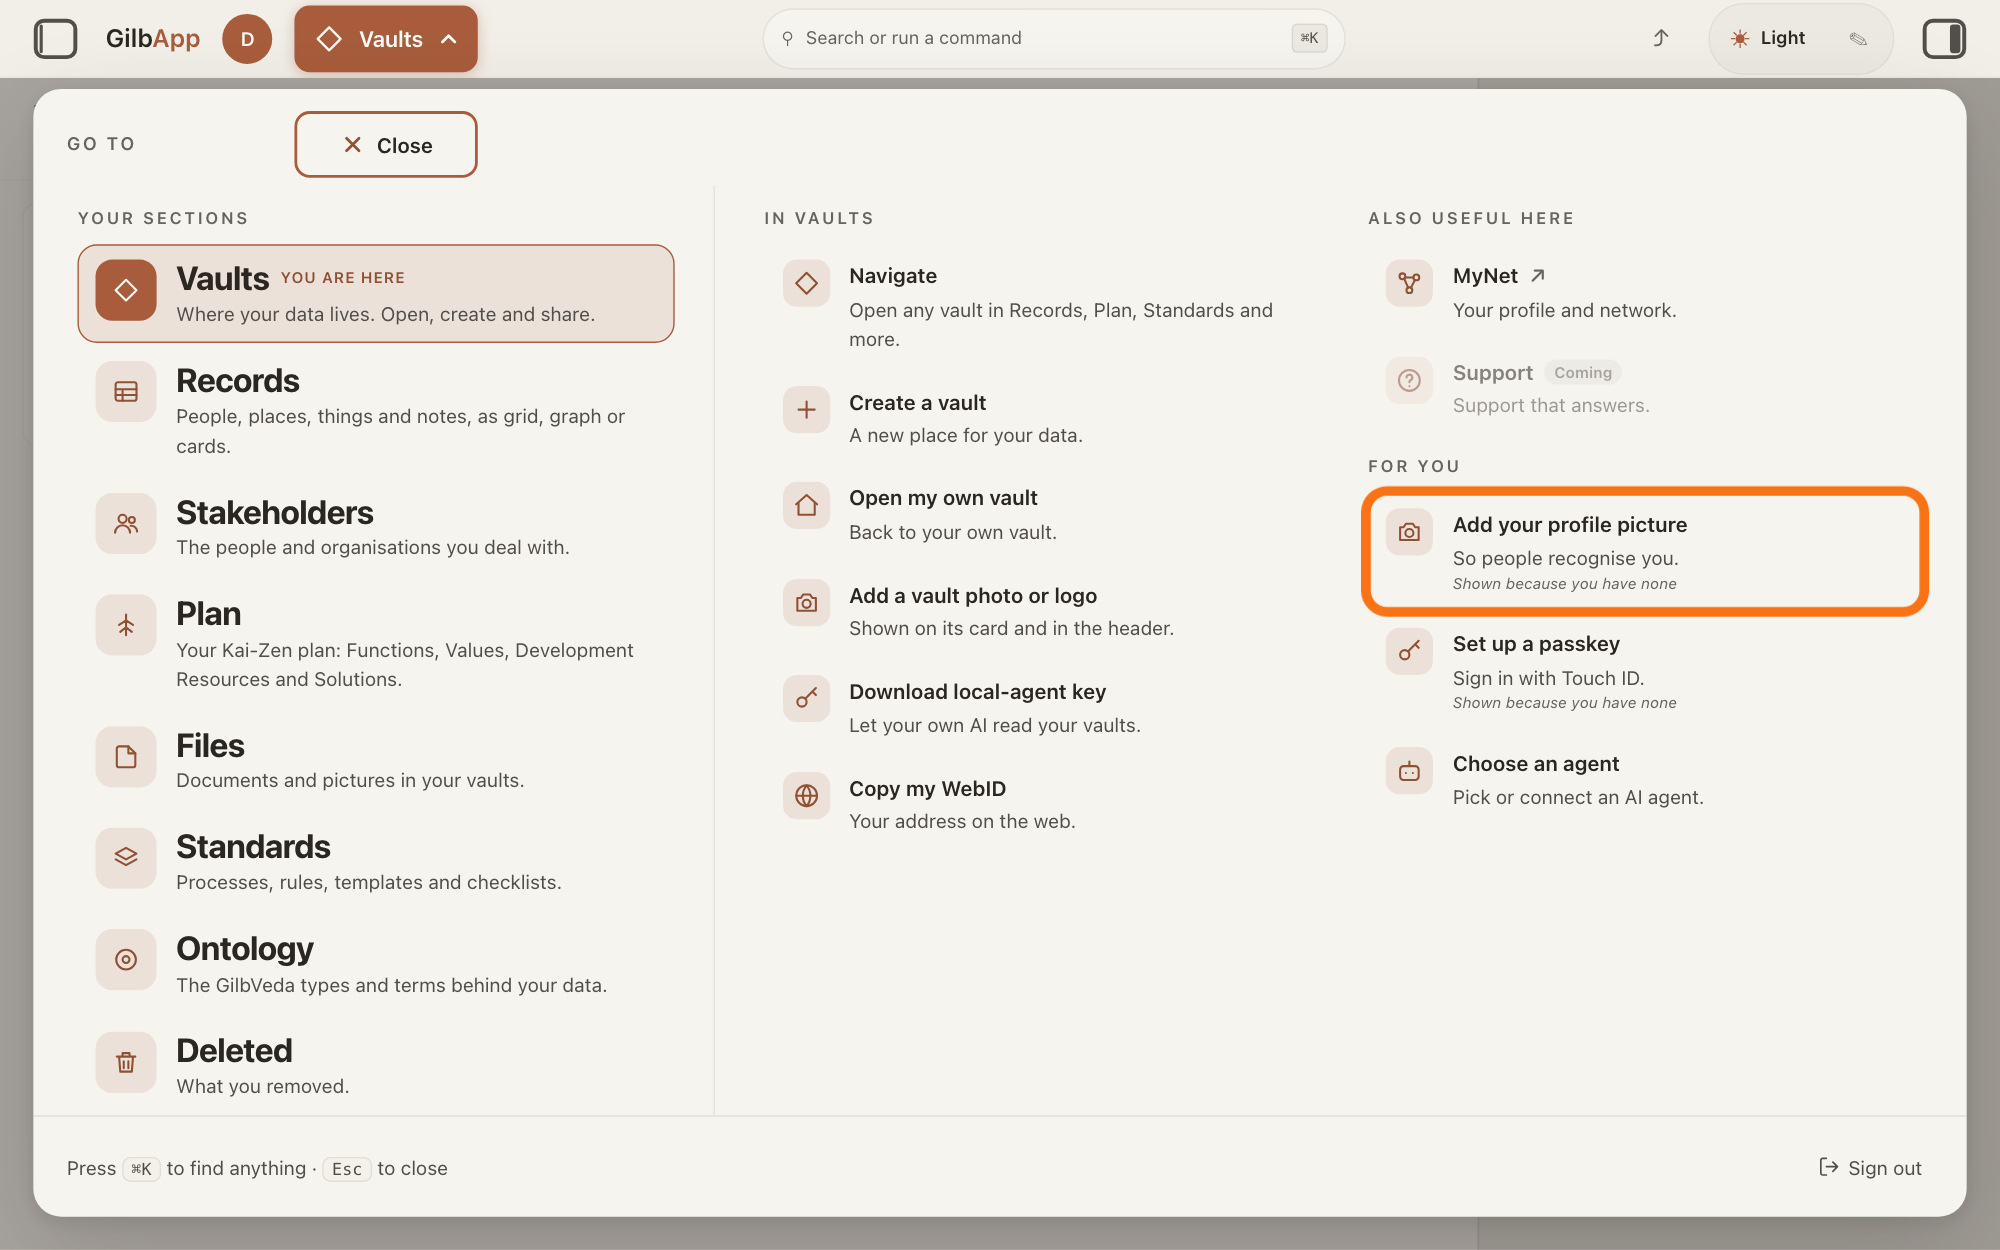
Press Main menu at the top left and choose Add your profile picture.
Press Main menu, next to your profile picture at the top left, and under FOR YOU choose Add your profile picture (So people recognise you.). GilbApp opens your own vault's details in the pane on the right, with the picture's menu open.
Show as text
At the top left, "Main menu" is open and the panel headed "GO TO" fills the window. Under "FOR YOU", the outlined row "Add your profile picture" reads "So people recognise you." Click it.
More about this
The button shows the name of the section you are in, such as Vaults. Add your profile picture shows only while you have no picture, and says Shown because you have none. To change a picture you have, search for picture in Search or run a command and select Change profile picture (Your own vault's picture.). Your profile picture is your own vault's picture; your own vault is the vault made when you signed up.
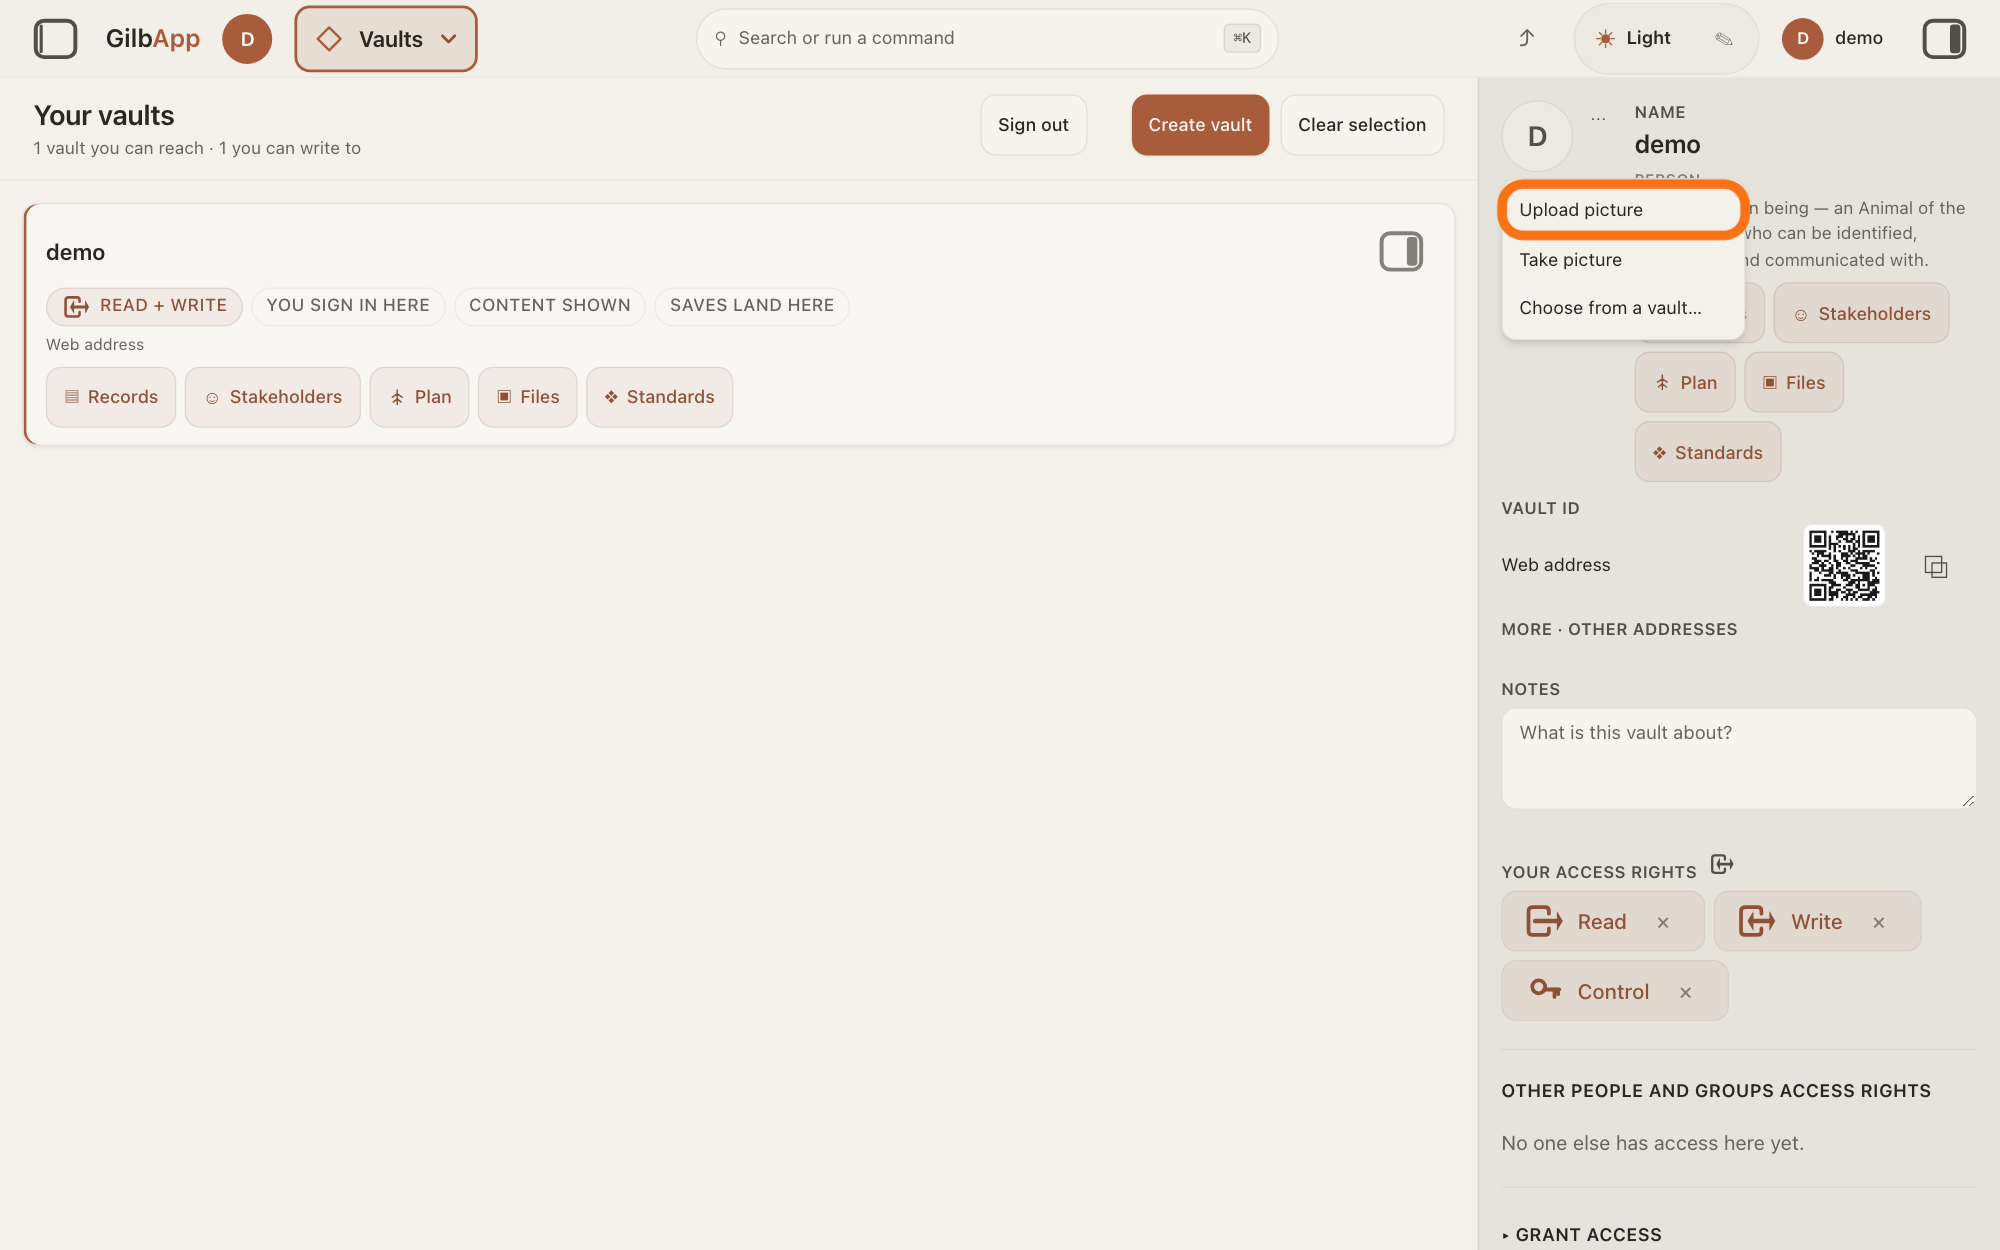
Choose Upload picture.
Choose Upload picture in the menu under the round picture at the top left of the pane. Your browser opens its window for choosing a file.
Show as text
The pane on the right shows your own vault. Under the round picture at its top left, a small menu lists "Upload picture", "Take picture" and "Choose from a vault…". The first item, "Upload picture", is outlined. Choose it.
More about this
Take picture is for a camera, such as a phone's; you do not need it here. Choose from a vault… lets you pick a picture already in one of your vaults instead; it becomes your picture at once, without step 4. A click outside the menu closes the menu.
Choose the picture file on your computer.
In your browser's window, select the picture file and confirm, as for any upload. GilbApp then shows the window Choose your face with your picture.
More about this
The file window belongs to your browser and your computer, not to GilbApp, so it looks different on each computer. If your browser cannot show that kind of picture, GilbApp saves the whole picture at once and says "This browser can't open that picture format, so we couldn't show you a crop box. Your picture is being saved and made smaller — once it appears, use “Cut again…” to frame your face."; then there is no step 4.
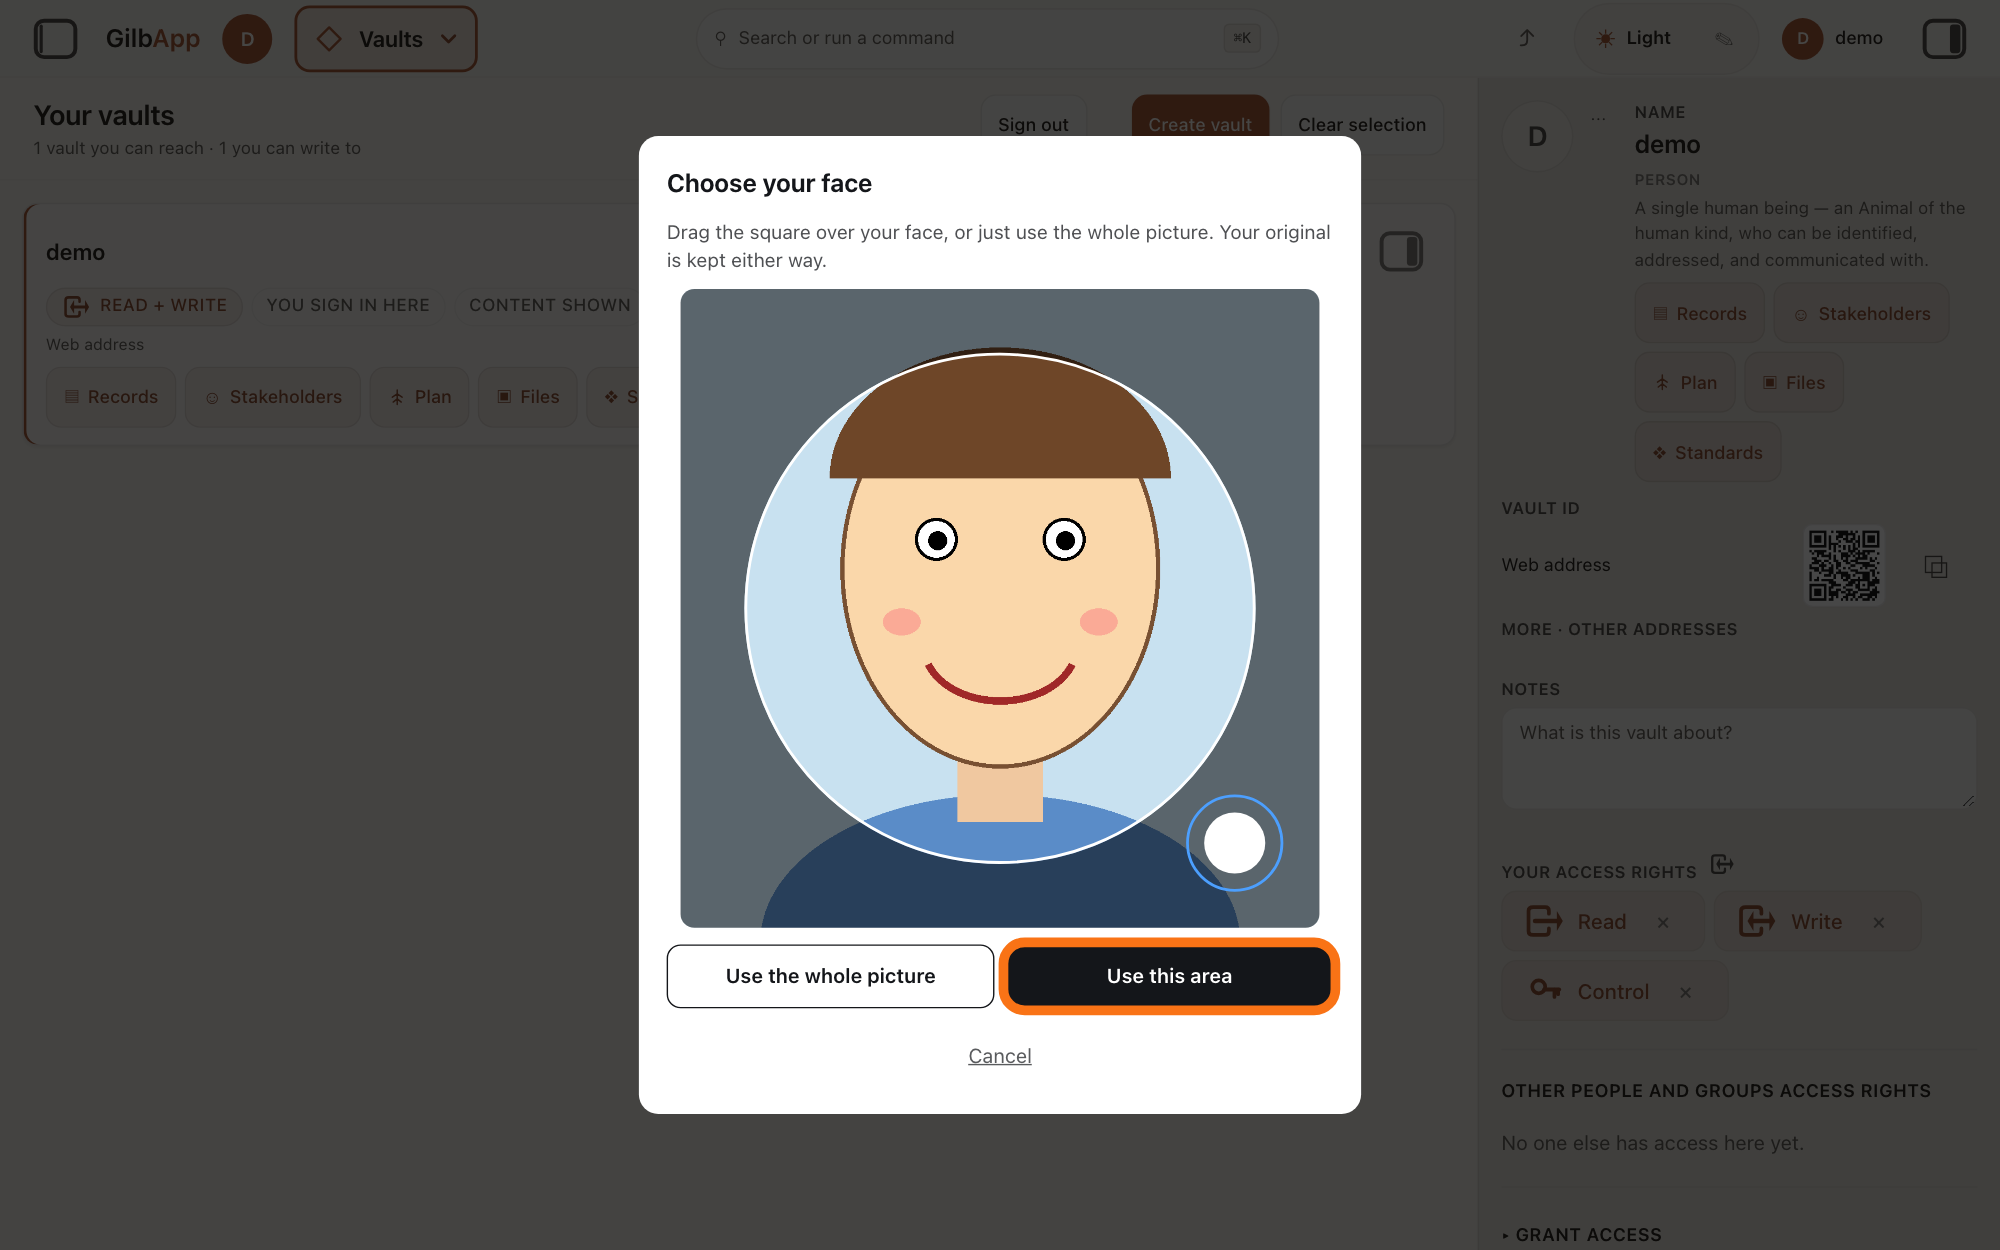
Drag the round frame over the part to show and press Use this area.
Drag the round frame over your face, and drag the small round handle at its bottom right to make it bigger or smaller. Then press Use this area.
Show as text
A window headed "Choose your face" covers the screen and reads "Drag the square over your face, or just use the whole picture." Your picture is shown with a round frame over it. Below are "Use the whole picture", the outlined "Use this area" and "Cancel". Press "Use this area".
More about this
The window says "Drag the square over your face, or just use the whole picture. Your original is kept either way." Use the whole picture uses all of it instead. Cancel, or Esc, closes the window and saves nothing. Once it is saved, your picture shows at the top left, next to Main menu. GilbApp and MyNet keep your picture in the same place, so a picture set in either shows in both.
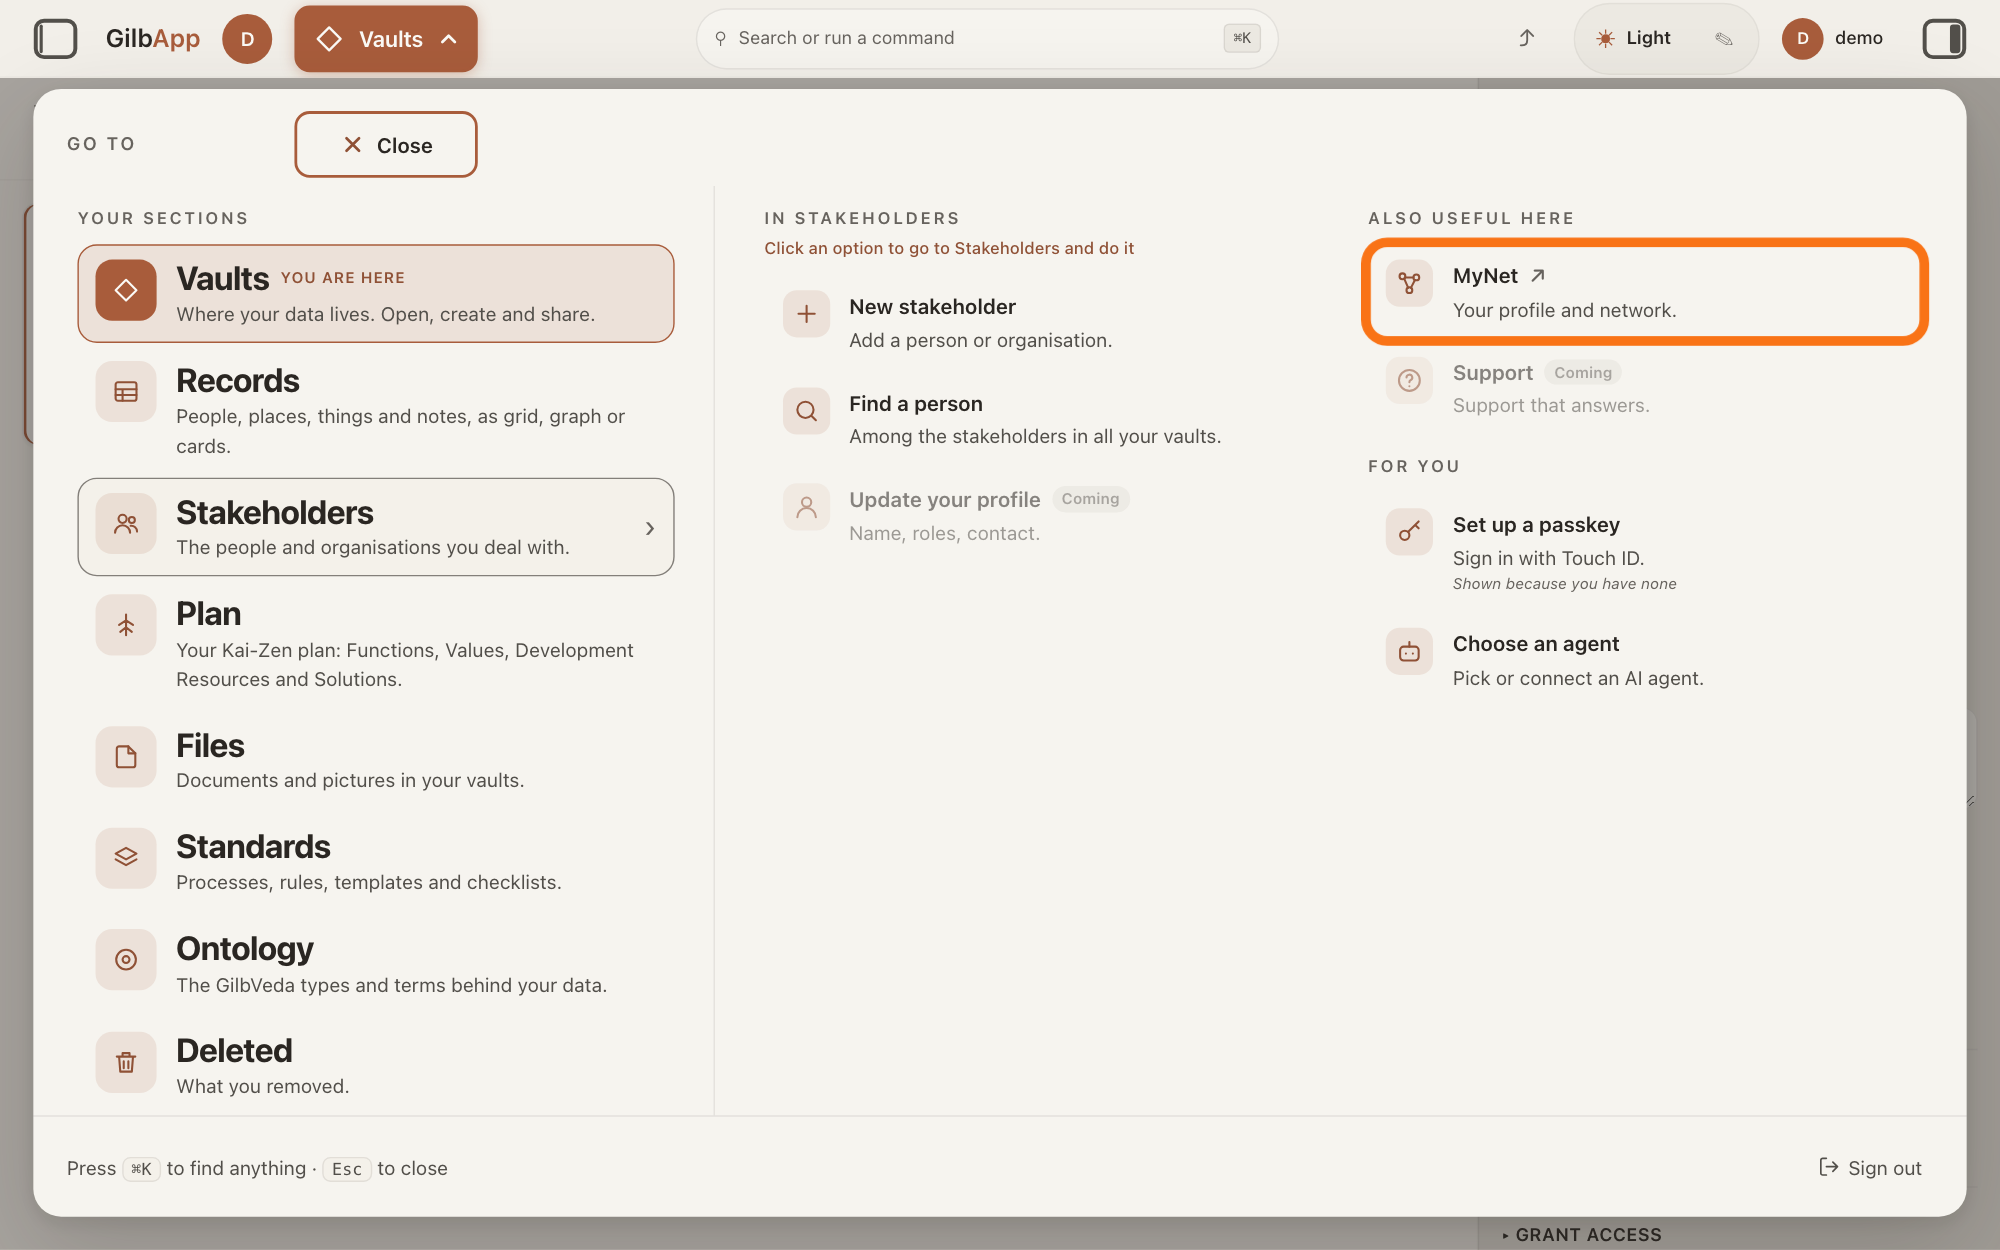
Press Main menu at the top left and choose MyNet.
Press Main menu at the top left, rest the pointer on Stakeholders and choose MyNet under ALSO USEFUL HERE. MyNet, Gilb's app for your profile and network, opens in a new tab.
Show as text
Press "Main menu" at the top left and rest the pointer on "Stakeholders". In the right-hand column "ALSO USEFUL HERE", press "MyNet ↗", "Your profile and network.", outlined in orange. MyNet opens in a new tab.
More about this
MyNet reads Your profile and network., and ↗ beside it means it opens in a new tab. MyNet may ask you to sign in first, with your e-mail address and a code, as GilbApp does. You can also type https://gilb.com/mynet in your browser's address bar. GilbApp has no place of its own for your name: Update your profile under Stakeholders is marked Coming.
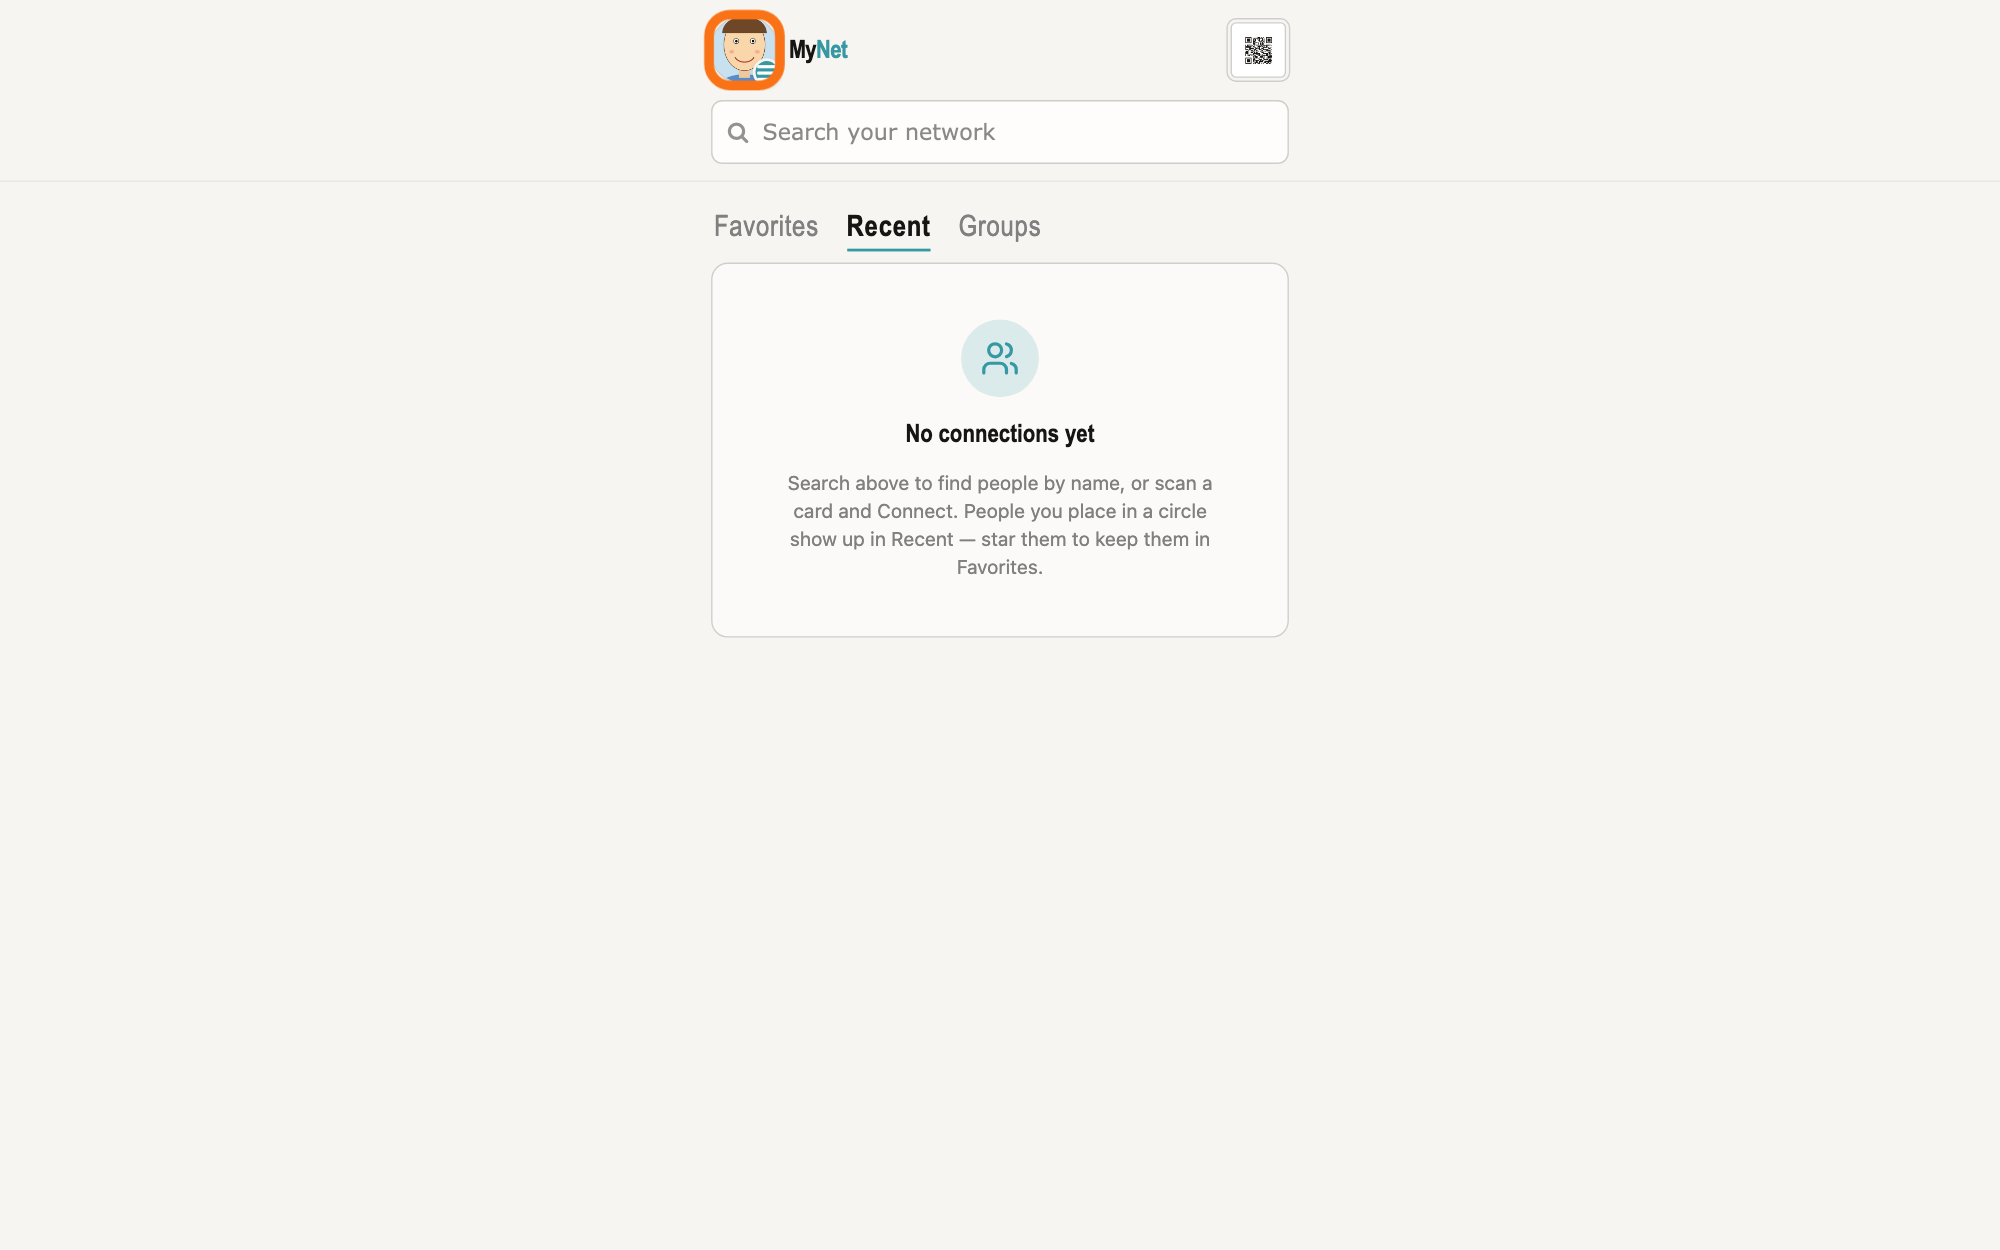
Press your picture at the top left to open your profile.
In MyNet, press your picture at the top left; its hover text is Open your profile. Your profile opens, with your details in cards headed First Name, Last Name and more.
Show as text
MyNet's home screen in its new tab. Your picture at the top left, left of the MyNet name, is outlined; resting the pointer on it shows "Open your profile". Press it to open your profile.
More about this
If there is no First Name card, press the plus sign at the top right and, in Select New Property under Name, choose First Name; then type your first name. Edit beside the plus sign shows the controls that remove a line; you do not need it to type your name.
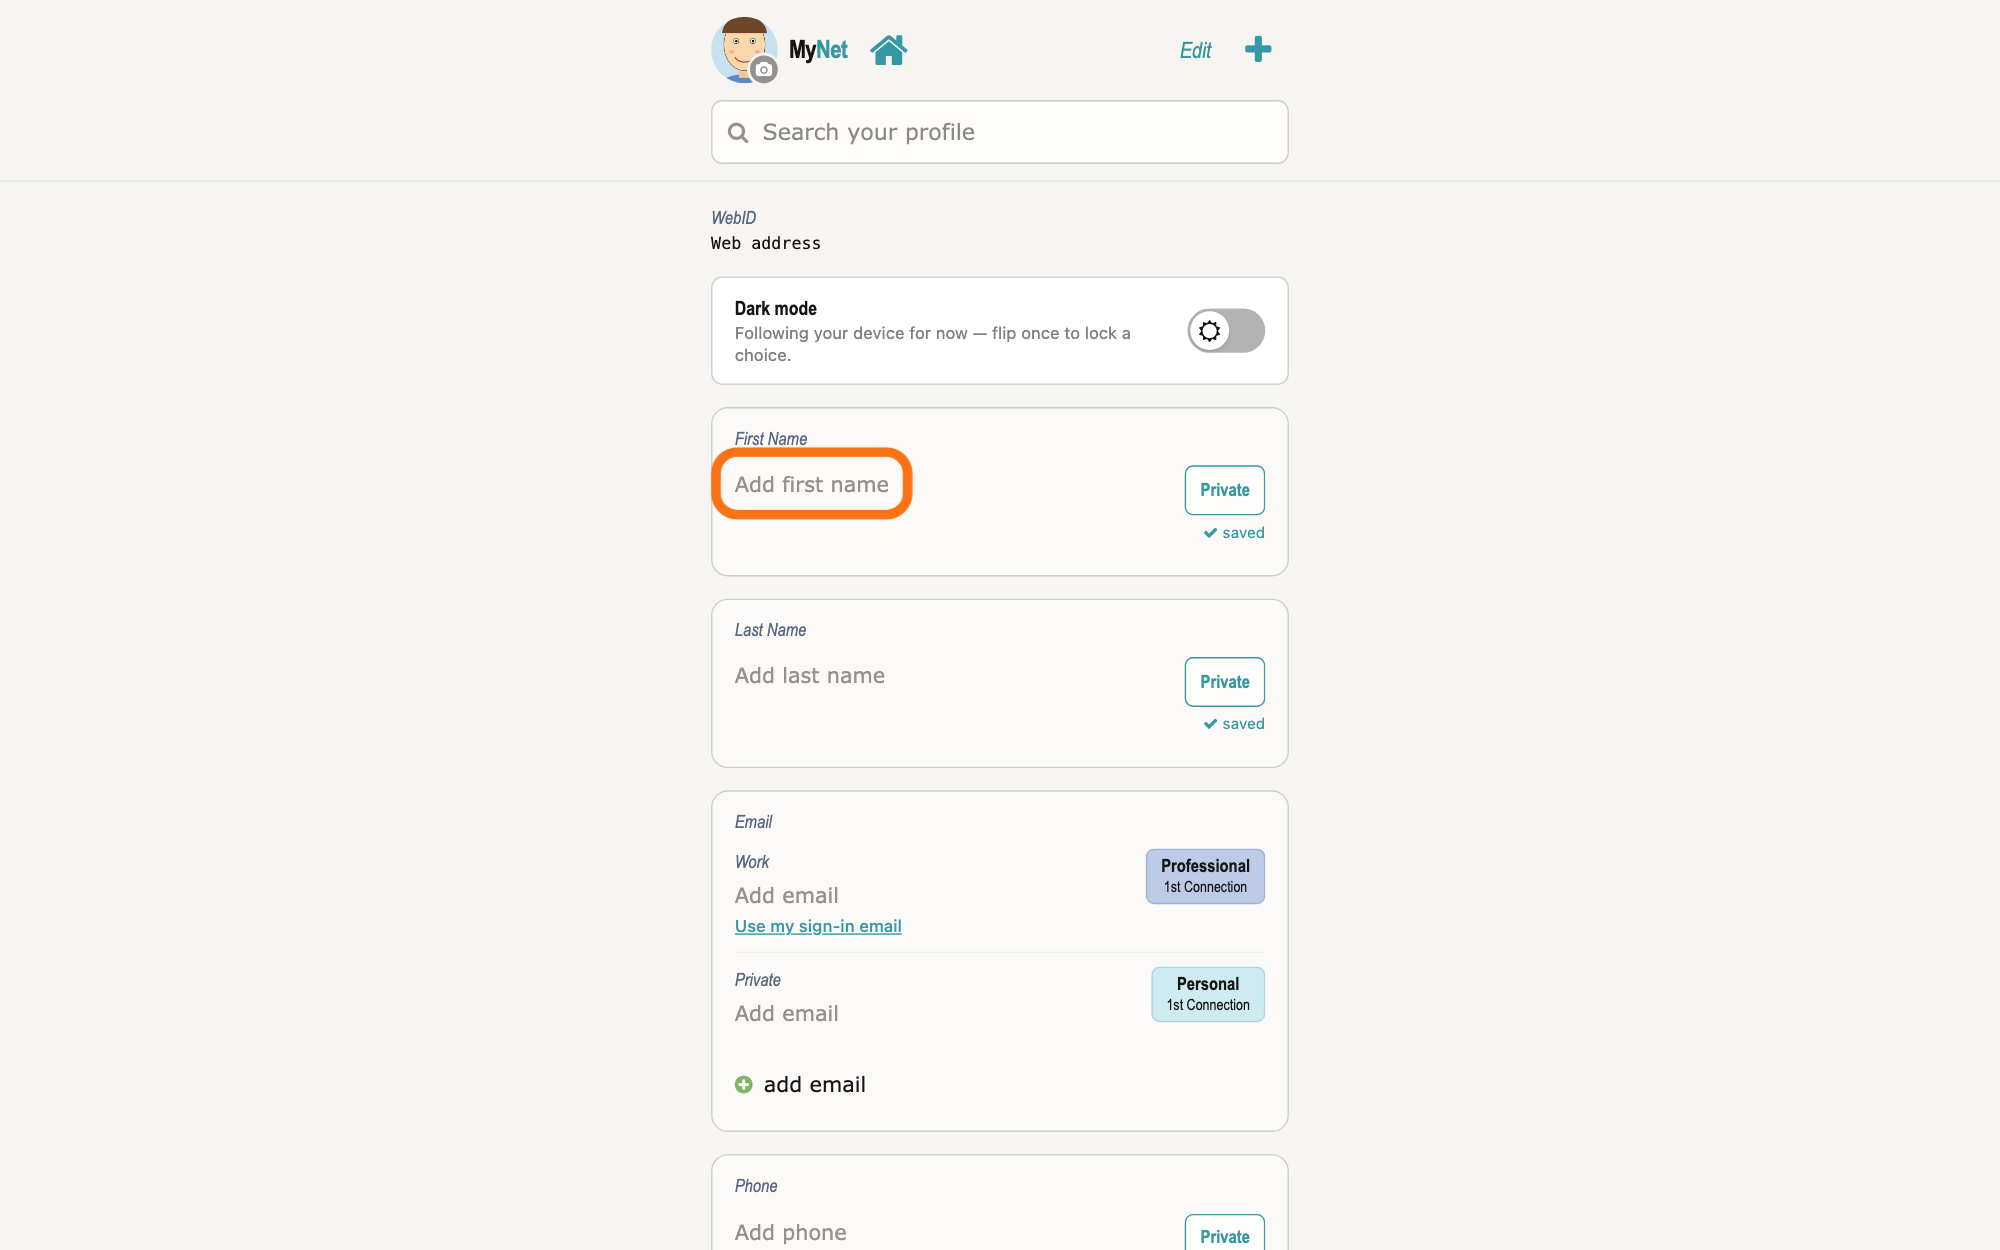
Type your first name in the First Name card and press Return.
Click the text in the First Name card, or Add first name when it is empty, type your first name and press Return. MyNet saves it.
Show as text
Your profile shows a box for each detail. In the box "First Name", the grey text "Add first name" is outlined. Click it, type your first name and press Return. The box "Last Name" below works the same way.
More about this
A click outside the box saves it too; Esc leaves the name as it was. Your picture shows in MyNet's profile too, with its own menu. The badge at the right of the name, such as Private, decides who may see and find that name; the answer on making yourself findable by name shows how to choose it.
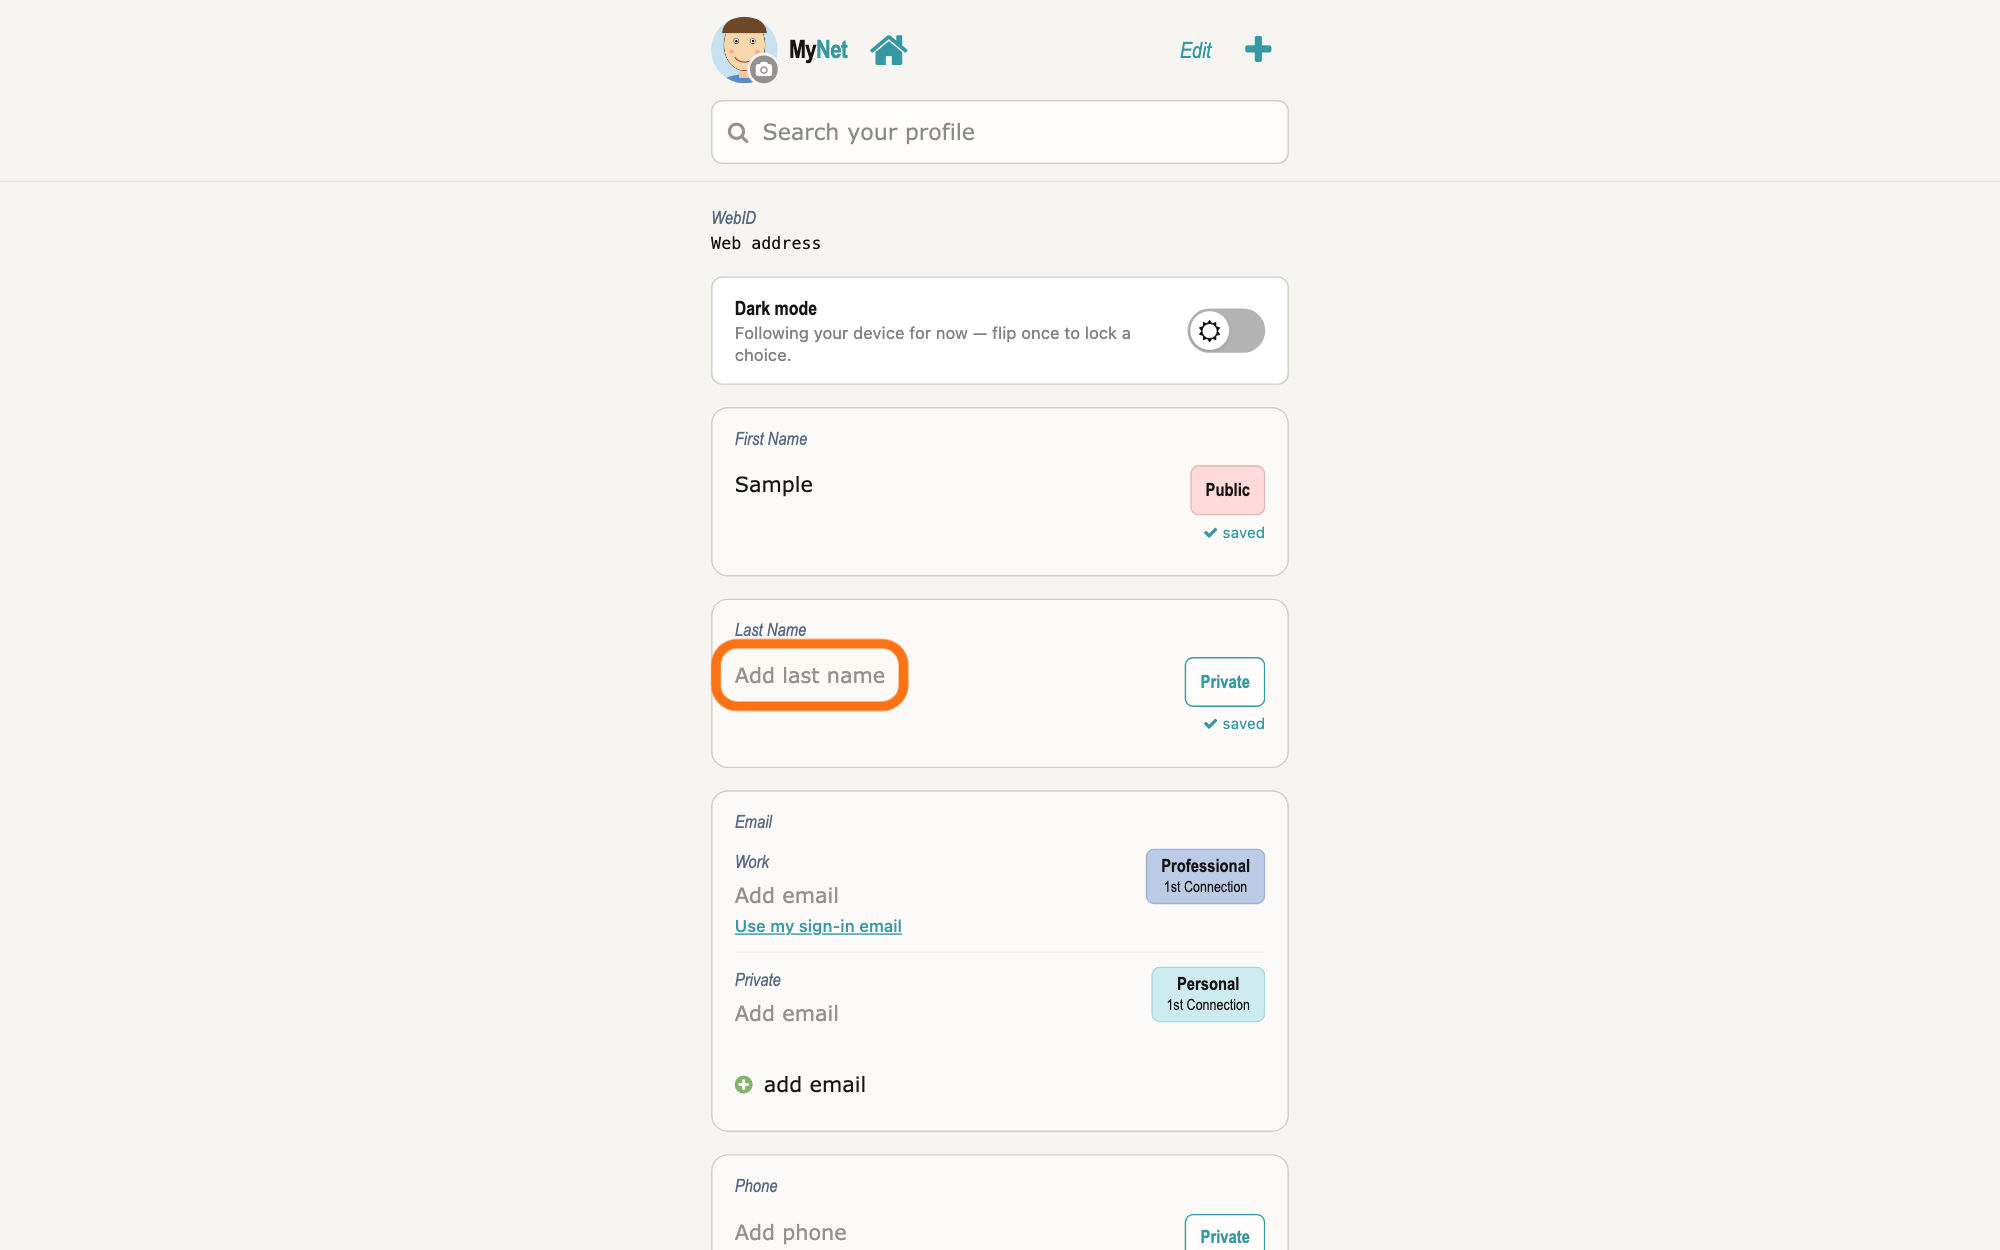
Type your last name in the Last Name card and press Return.
Click the text in the Last Name card, or Add last name when it is empty, type your last name and press Return. MyNet saves it.
Show as text
The box "First Name" now holds the name you typed. In the box "Last Name" below, the grey text "Add last name" is outlined. Click it, type your last name and press Return.
More about this
If there is no Last Name card, add it with the plus sign as in step 6. Each name has its own badge, so you can let people see one and not the other.
Deeper
Your picture and your names say who you are to the people you work with. Your profile is your page in MyNet, Gilb's app for your profile and network: it holds your picture, your names and other details, and each detail has a badge that decides who may see it. A picture gives no one access to your vault, and neither does a name.
To change or remove your picture later, press it in your own vault's details: the menu then reads View large, Replace with file…, Replace from camera…, Replace from a vault… and Delete photo. Delete photo takes the picture off at once, without asking; the file stays in the vault. The answer on setting a vault's picture says more; your own vault's picture works the same way.
Your vault name is not your name: it is your vault's address, and GilbApp has no way to change it. The answer on naming your vault says more.
This answer is written for a computer screen.
Source: GilbApp 96968de7c3e3e685296f20a2599cbc8d305c9ea7 (live at https://gilb.com/app/version.json, read 12 November 2026; VaultAvatar.tsx, VaultDetail.tsx, VaultsView.tsx, gilbAppMenuRows.ts and sectionMenuList.ts unchanged since af0f04ee): src/components/menu/sectionMenuList.ts:322-326 (Add your profile picture, So people recognise you., Shown because you have none, openOwnVault(vault-picture)), :305-306 (MyNet, Your profile and network.), :356-357 (Change profile picture, Your own vault's picture.); src/components/AppShell.tsx:1730-1732 (opens your own vault's pane); src/components/VaultAvatar.tsx:414-416 (the menu opens at once for that door), :636-652 (Upload picture, Take picture, Choose from a vault…; with a picture Replace with file…, Replace from camera…, Replace from a vault…), :399-406 (browser cannot show the format), :799-815; src/shell/gilbAppMenuRows.ts:154 (Update your profile, coming); src/lib/base/vaultProfilePhoto.ts:1-7 (the same store MyNet uses, so a photo set in either app shows in both). Picture package gilb-photo (linked by GilbApp): src/FaceCropper.tsx (Choose your face, Use this area, Use the whole picture, Cancel). MyNet e894951bcfda372a6218c512c15bb4b582c1a794 (live at https://gilb.com/mynet/version.json, read 12 November 2026): src/components/AppShell.tsx:495-512 (Edit/Save, plus sign Add new property); src/components/profile/Avatar.tsx:138 (Open your profile), :205-240 (the picture on the profile, with its menu); src/model/profile.ts:523-524 (First Name, Last Name); src/components/profile/FieldRow.tsx:93-96 (a click starts editing), :120-154 (Return or a click outside saves; Esc cancels), :353-380 (the box; Add first name when empty), :191-213 (edit mode adds the remove controls); src/components/profile/AddPropertySheet.tsx:43 (Select New Property). Live help pages, sentences shared word for word: How do I set a vault's picture? (steps 4-6 and the change/remove menu), How do I make myself findable by name? (steps 1-2 and the MyNet sentences), How do I sign in with a passkey? (Main menu placement).
Checked against GilbApp d529620.